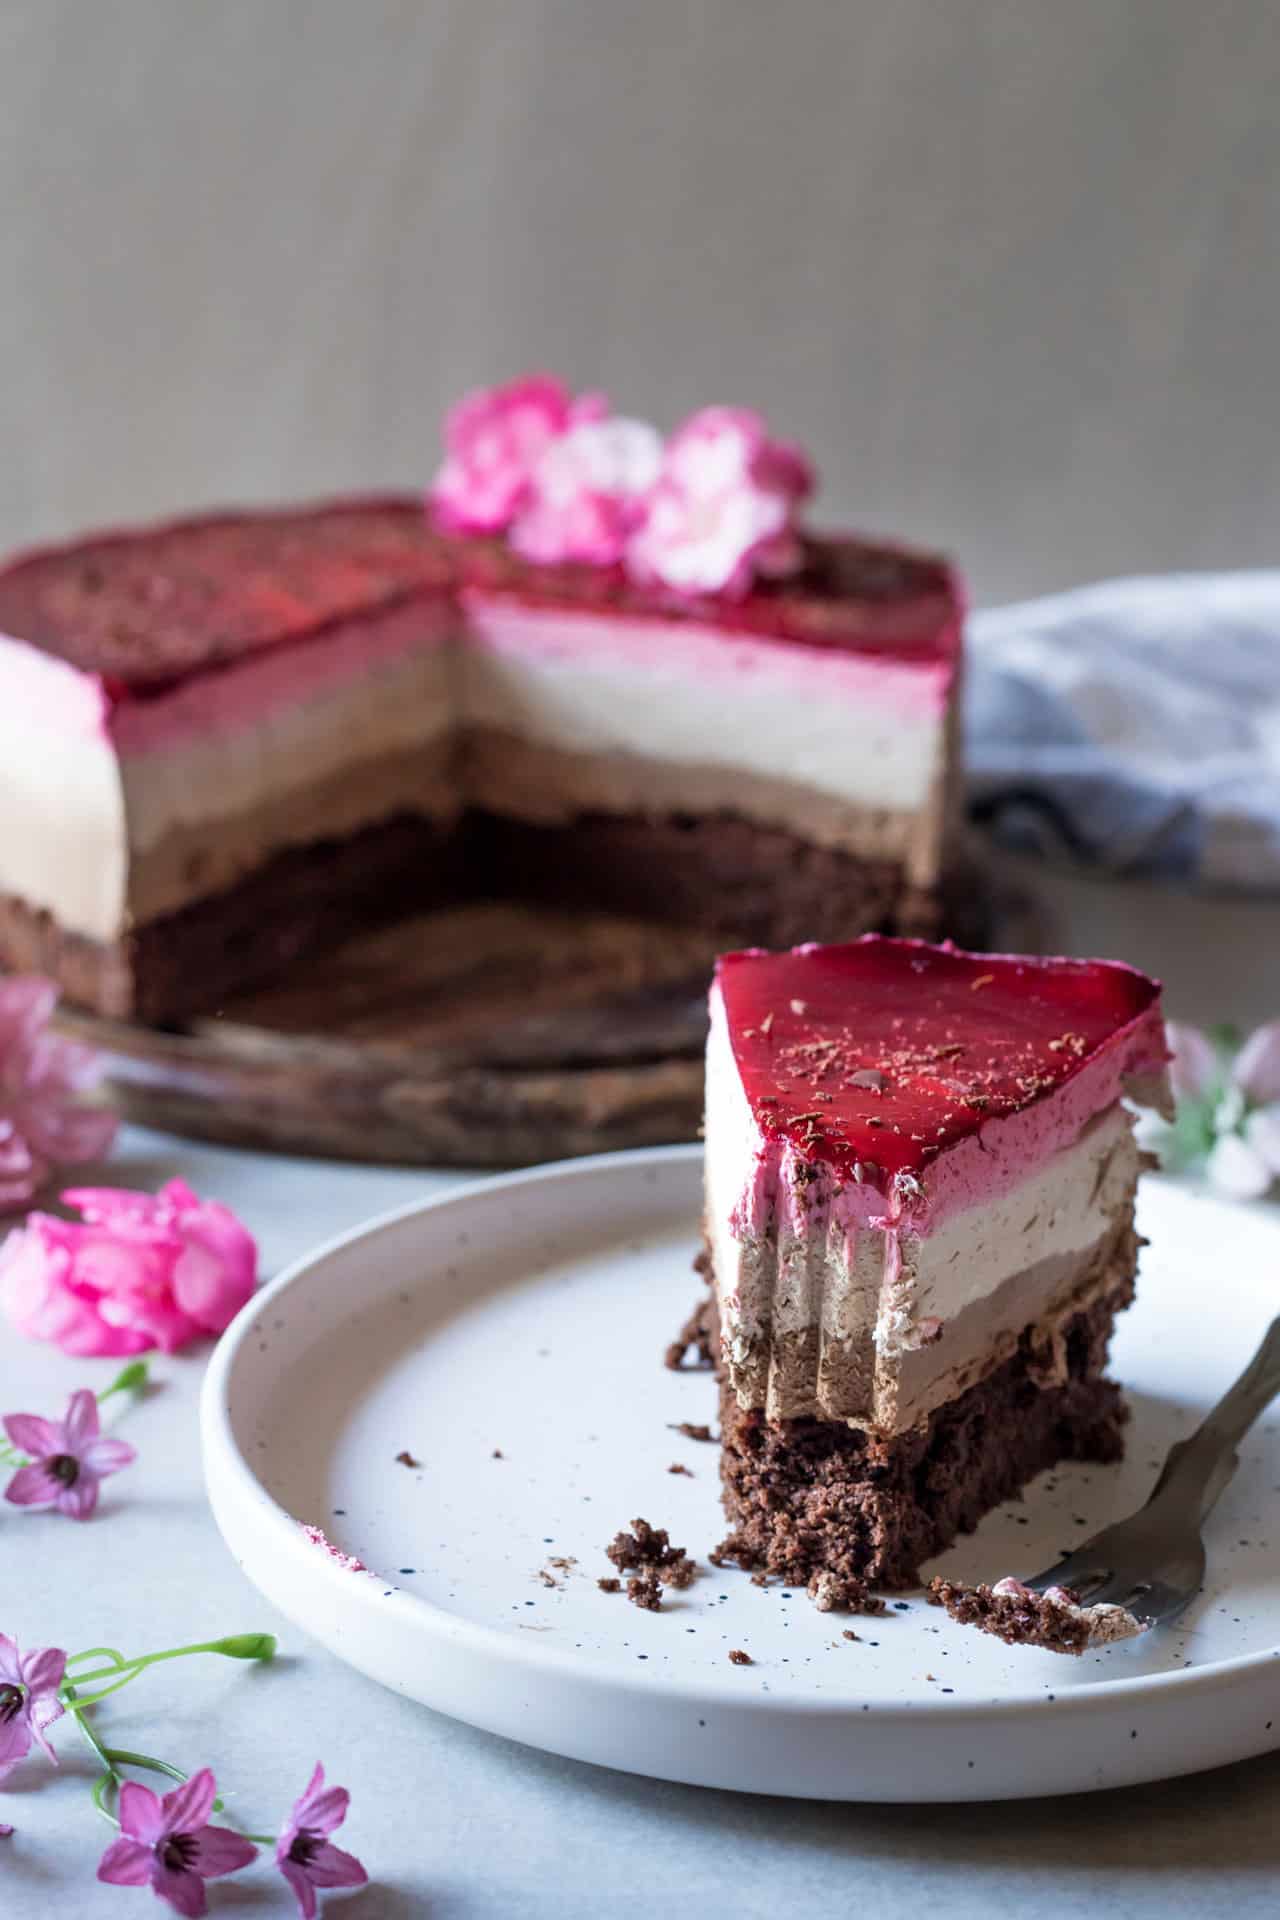
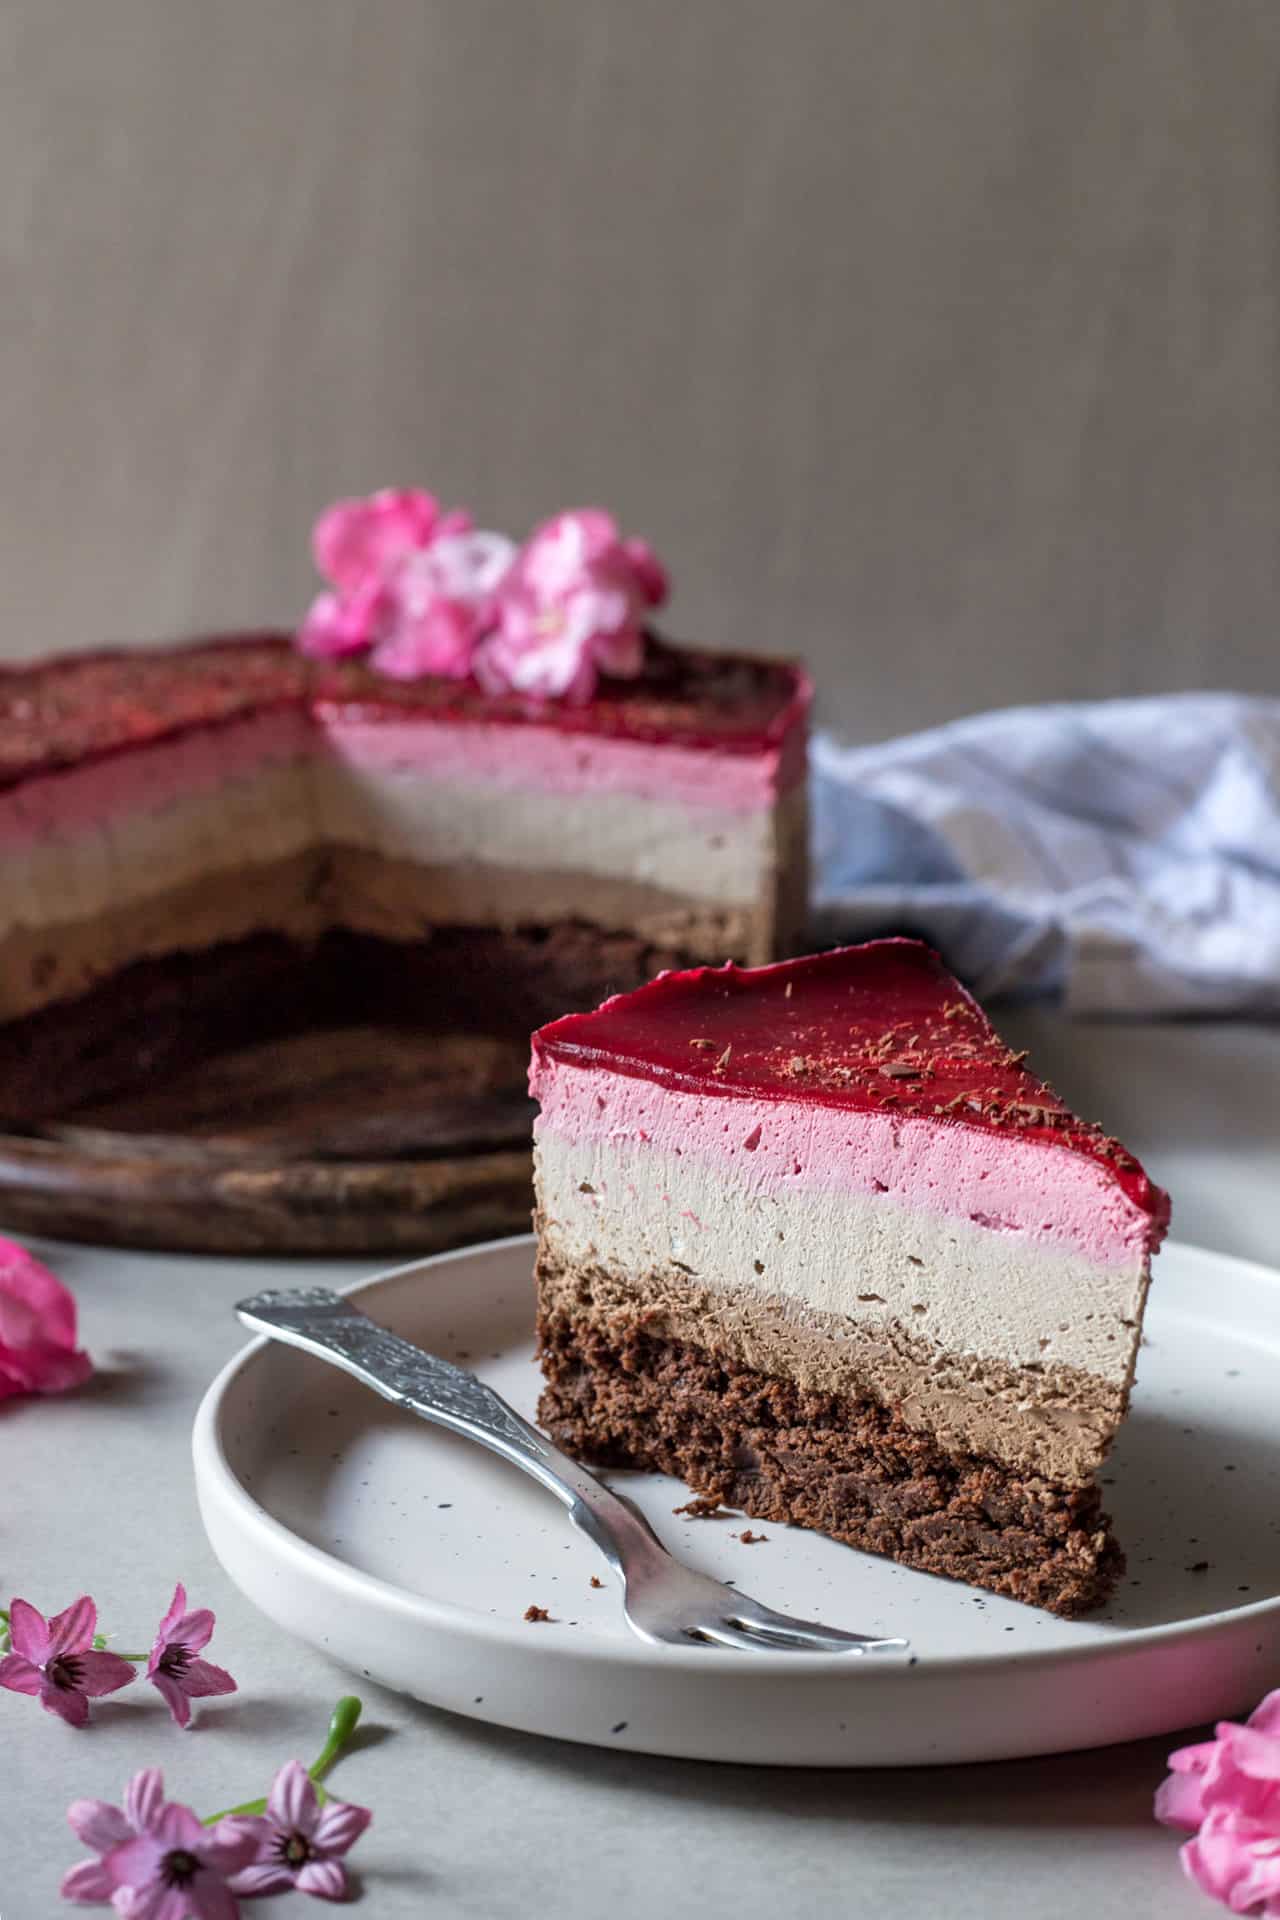
Mousse cakes are my latest discovery and my newest obsession. Yes, sadly only recently I tried a mousse cake. And I was hooked from the first bite! Ever since I’ve been making a million varieties of mousse cakes, I wish that I can share all of them with you because they all tasted very good. However, I think that would be a tiny bit too many mousse cakes for one day 😉 So I choose to post my favorite so far, Gluten Free Chocolate and Raspberry Mousse Cake.

Gluten-free Chocolate and Raspberry Mousse Cake Recipe
Where shall I begin describing this heavenly cake? The whole cake tastes so delicious. It is light, chocolatey, fruity, refreshing, and flavorful. The brownie layer is dense and moist, it is perfectly sweetened and bursting with deep chocolate flavor. The 3 mousse layers are silky and smooth, the first two layers are chocolatey and sweet while the final raspberry layer is fruity and refreshing, which gives that perfect balance of sweet and sour. The two main flavors chocolate and raspberry go very well together. No words can explain how freaking yummy this cake tastes, guess the best advice I can give you is to try it 😉

How to make this Gluten-free Chocolate and Raspberry Mousse Cake?
It is very simple and fun cake to make, even my mom who hates making cakes has agreed on that! First, you will need to make the brownie base and after the 3 different mousse layers. I know that when you see it, it might look like a difficult cake to make, with all the pretty layers. But trust me it is easy, it is one of the easiest cakes to make. Even if you don’t know much about cakes you can whip this one up, and look like a pro when you serve it to guests. You are welcome 😉
For the detailed step-by-step scroll at the end of this page.
What flour to use to make the brownie part of this cake?
I like to use my universal homemade gluten-free flour blend. Which is a mix of the following flours :
3. Sweet Rice Flour (Glutinous Rice aka Sticky Rice)
4. Tapioca Flour (tapioca starch is the same as tapioca flour)
5. Xanthan Gum
If you can’t make that one, you can try with any gluten-free flour mix (just make sure it contains xanthan gum because that helps in binding the dough). The final result using different flour mix might vary slightly, depending on what flours your mix contains.
To find the recipe for my gluten-free flour mix click, HERE.
* Make-Ahead Tip:
*You can make this cake a day before and let it set in the fridge overnight. It keeps well in the fridge for up to 4 days.
*FODMAP Tip:
*To make sure that your flour mix is fodmap friendly I recommend that you make your own gluten-free flour mix, I always like to use my homemade gluten-free flour blend. Or, if you can't make your own then always read the ingredients of the store-bought gluten-free flour mixes. Make sure your mix doesn’t contain soy flour, chickpea/besan/gram/garbanzo bean flour, lentil flour, coconut flour, amaranth flour, or lupin flour.
*For this recipe, I used lactose-free whipping cream. However, if you can't get your hands on lactose-free whipping cream, you can use normal whipping cream. According to Monash University whipping cream is Low FODMAP in 60g. If you are using a normal whipping cream which is not specified to be lactose-free, regulate your serving portions according to the Monash University recommended low fodmap dose.
*To make sure that your flour mix is fodmap friendly I recommend that you make your own gluten-free flour mix, I always make this one. Or always read the ingredients of the store-bought gluten-free flour mixes. Make sure your mix doesn’t contain soy flour, chickpea/besan/gram/garbanzo bean flour, lentil flour, coconut flour, amaranth flour, or lupin flour.
*For this recipe I used Vegan Rice Milk Chocolate, however, if you can't find that you can use normal milk chocolate. According to Monash University, Milk Chocolate is Low FODMAP in 20g per serving. This cake uses 100g milk chocolate but serves 6 portions (that is about 17g per portion). Another option would also be to swap the milk chocolate for another layer of dark chocolate mousse.
*As a general rule always read the labels of the ingredients that you use as there can be sneaky FODMAP's in any product. To educate yourself of which foods are high in FODMAP's I'd strongly recommend downloading Monash Unversity FODMAP Diet App
*Gluten-Free Tip:
If you are celiac or highly sensitive to gluten, buy certified gluten-free baking powder and baking soda. Baking powder and baking soda are naturally gluten-free, however, depending on the manufacturing place and process they could be cross-contaminated.
Recipe

Gluten-Free Chocolate and Raspberry Mousse Cake
Equipment
- springform pan with a diameter 18cm and hight 9,5cm
Ingredients
For The Brownie Layer
- 100 g gluten-free flour
- 50 g Cocoa Powder
- ½ teaspoon Salt
- ½ teaspoon Baking Powder
- 100 g Unsalted Butter
- 200 g White Sugar
- 2 Large Eggs (at room temperature)
- 2 teaspoon Vanilla Extract
For the Dark Chocolate Mousse Layer
- 150 g Dark (Or Semi-Sweet) Chocolate
- 280 ml Lactose-Free Whipping Cream (divided)
- 4 g Gelatin Powder
- 20 ml Cold Water
For the Milk Chocolate Mousse Layer
- 100 g Vegan (Rice Milk Chocolate) you can also use non-vegan milk chocolate * see FODMAP Tips to adjust the portions.
- 280 ml Lactose-Free Whipping Cream (divided)
- 4 g Gelatin Powder
- 20 ml Cold Water
For the Rasberry Mousse Layer
- 300 g Fresh or Frozen Raspberries
- 50 g Sugar
- 10 ml Lemon Juice
- 5 g Gelatin Powder
- 30 ml Cold Water
- 200 ml Lactose-Free Whipping Cream (chilled)
For the Raspberry Jelly
- 100 g Fresh or Frozen Raspberries
- 20 g Sugar
- 3 g Gelatin Powder
- 15 ml Cold Water
Instructions
To Make the Brownie Layer
- Preheat the oven to 180 C. Line a cake pan with parchment and spray well with nonstick cooking spray. Whisk together the flour, cocoa powder, salt, and baking powder in a small bowl. And set it aside for now.
- Place the butter in a saucepan over medium-low heat. Stir occasionally as the butter melts. Add the sugar and stir it into the melted butter until combined.
- Remove the pan from the heat, and let it cool to lukewarm. Once it has cooled, add the eggs, one at a time, whisking well between each addition. Whisk until the mixture become smooth. Continue by whisking in the vanilla. And finally, add the dry ingredients, and stir them in with a spatula.
- Scrape the brownie batter into the prepared pan, and bake it for 20 to 25 minutes, or until a toothpick comes out clean. Cool the brownie layer completely before proceeding with the mousse layers.
Prepare the Dark Chocolate Mousse Layer
- In a heatproof bowl add the dark chocolate and 120ml whipping cream. Place the bowl over a saucepan with simmering water, over low heat, until all the chocolate is melted
- Meanwhile, dissolve gelatin in cold water and let it swell for about 5 minutes. Place the gelatin over low heat just until the gelatin dissolves and pour it over the melted chocolate mixture. Let the chocolate mixture cool completely at room temperature.
- Whip the remaining 160ml chilled whipping cream until stiff peaks form. Add melted chocolate mixture and mix until well combined.
- Pour the chocolate mousse over the crust and refrigerate for about 15-20 minutes to set slightly, until you prepare the next layer of chocolate mousse.
Prepare the Milk Chocolate Mousse
- Repeat the same steps for preparing the milk chocolate mousse.
Prepare the Rasberry Mousse
- Place raspberries, sugar and lemon juice in a small saucepan and place over medium heat, bring to a boil and cook for 5 minutes. Remove from heat and sieve to remove seeds.
- Meanwhile, dissolve gelatin in cold water and let it swell for about 5 minutes. Add the gelatine over the warm raspberry sauce and stir to dissolve. Let the raspberry mixture cool at room temperature.
- Whip the chilled whipping cream until stiff peaks form. Add the cooled raspberry mixture and mix until well combined. Pour over the set milk chocolate mousse layer. Refrigerate for 30 minutes.
Prepare raspberry jelly
- Place raspberries and sugar in a small saucepan and place over medium heat, bring to a boil and cook for 2 minutes. Remove from heat and sieve to remove seeds. Set aside while you prepare the gelatin.
- Dissolve gelatin in 1 tablespoon cold water and let it swell for about 5 minutes. Add the gelatine over the warm raspberry sauce and stir to dissolve. Let the raspberry mixture cool at room temperature and pour over the raspberry mousse.
- Refrigerate the cake for at least 4 hours or overnight to set
- Once the cake is set and ready to be served, run a knife around the edges of the cake to remove the sides of the pan.

alessandra says
Thanks for this delicious looking recipe. I'll try it next week for my husband's birthday. What size cake tin did you use please? Thanks
Gluten Free Stories says
Hi, I hope you gonna like it! 🙂 I used a 9-inch cake tin.
Kristin says
Did you use a spring form pan? What depth with all the mouse layers?
Gluten Free Stories says
Hi Kristin, Yes I used a springform pan, the depth of mine is 9,5cm.