
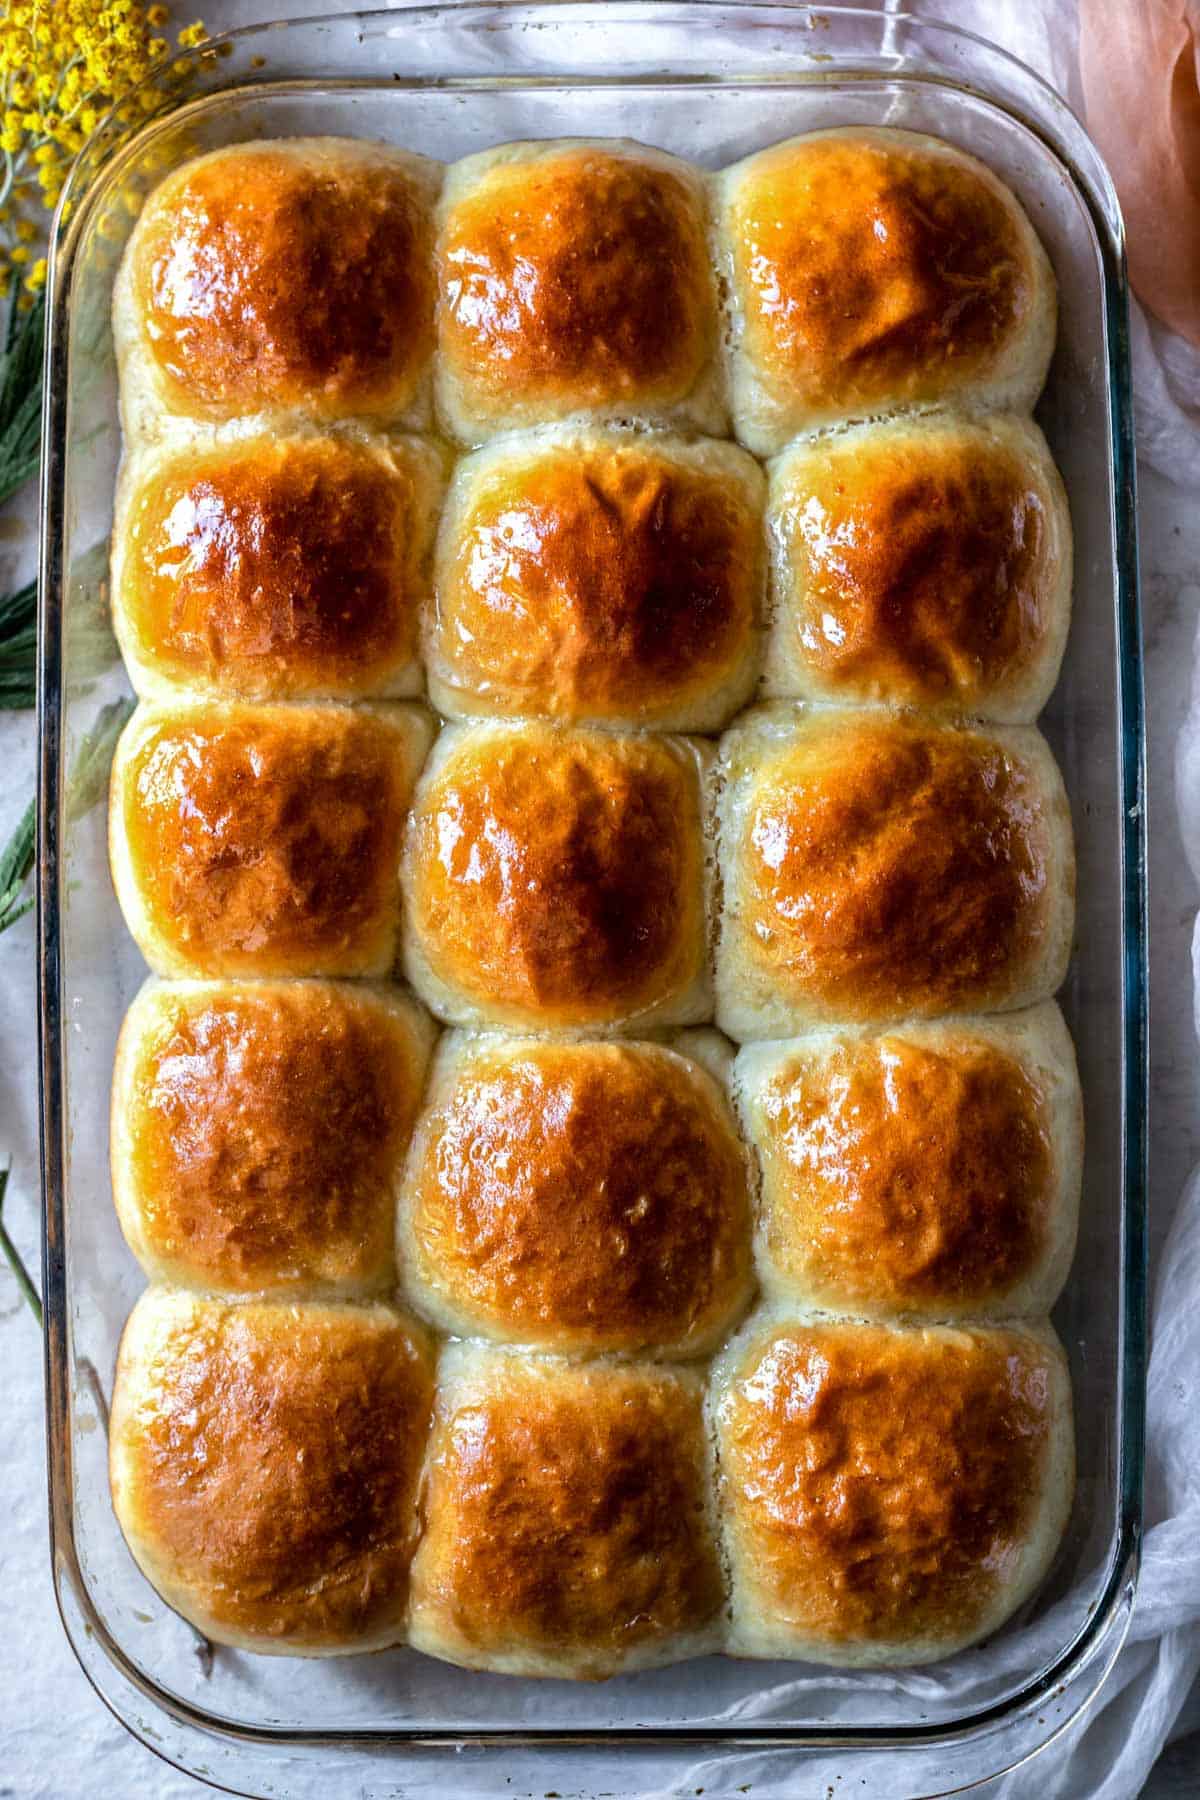
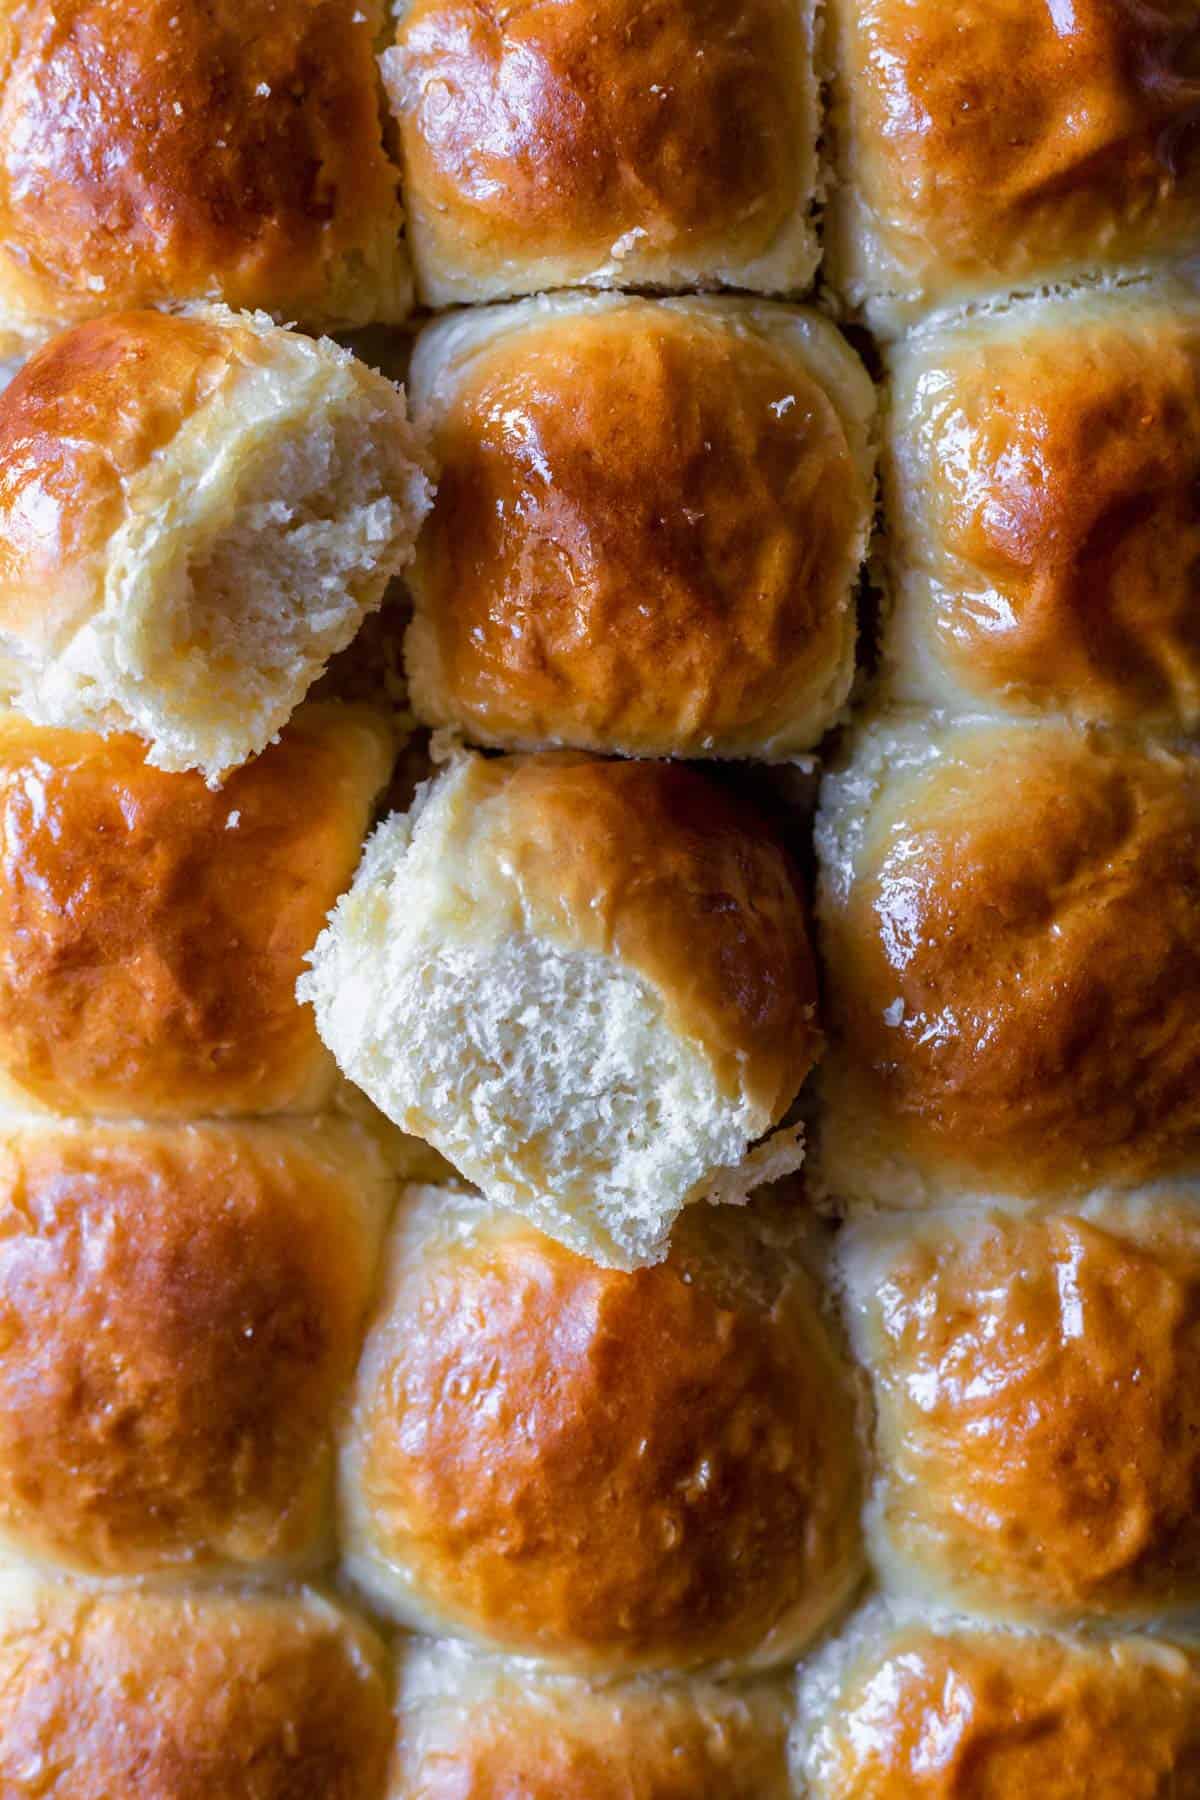
There is nothing better than freshly baked, soft, buttery, and extra flaky dinner rolls, especially when they are gluten-free. These Gluten-Free Dinner Rolls are so good that they will outshine any main dish!
My favorite thing about these rolls is that they require only a few simple ingredients and how easy they are to make!
If you want more gluten-free rolls, check out these Gluten-Free Hawaiian Rolls and Gluten-Free Crescent Rolls.
Jump to:
❤️ Why you will love these dinner rolls
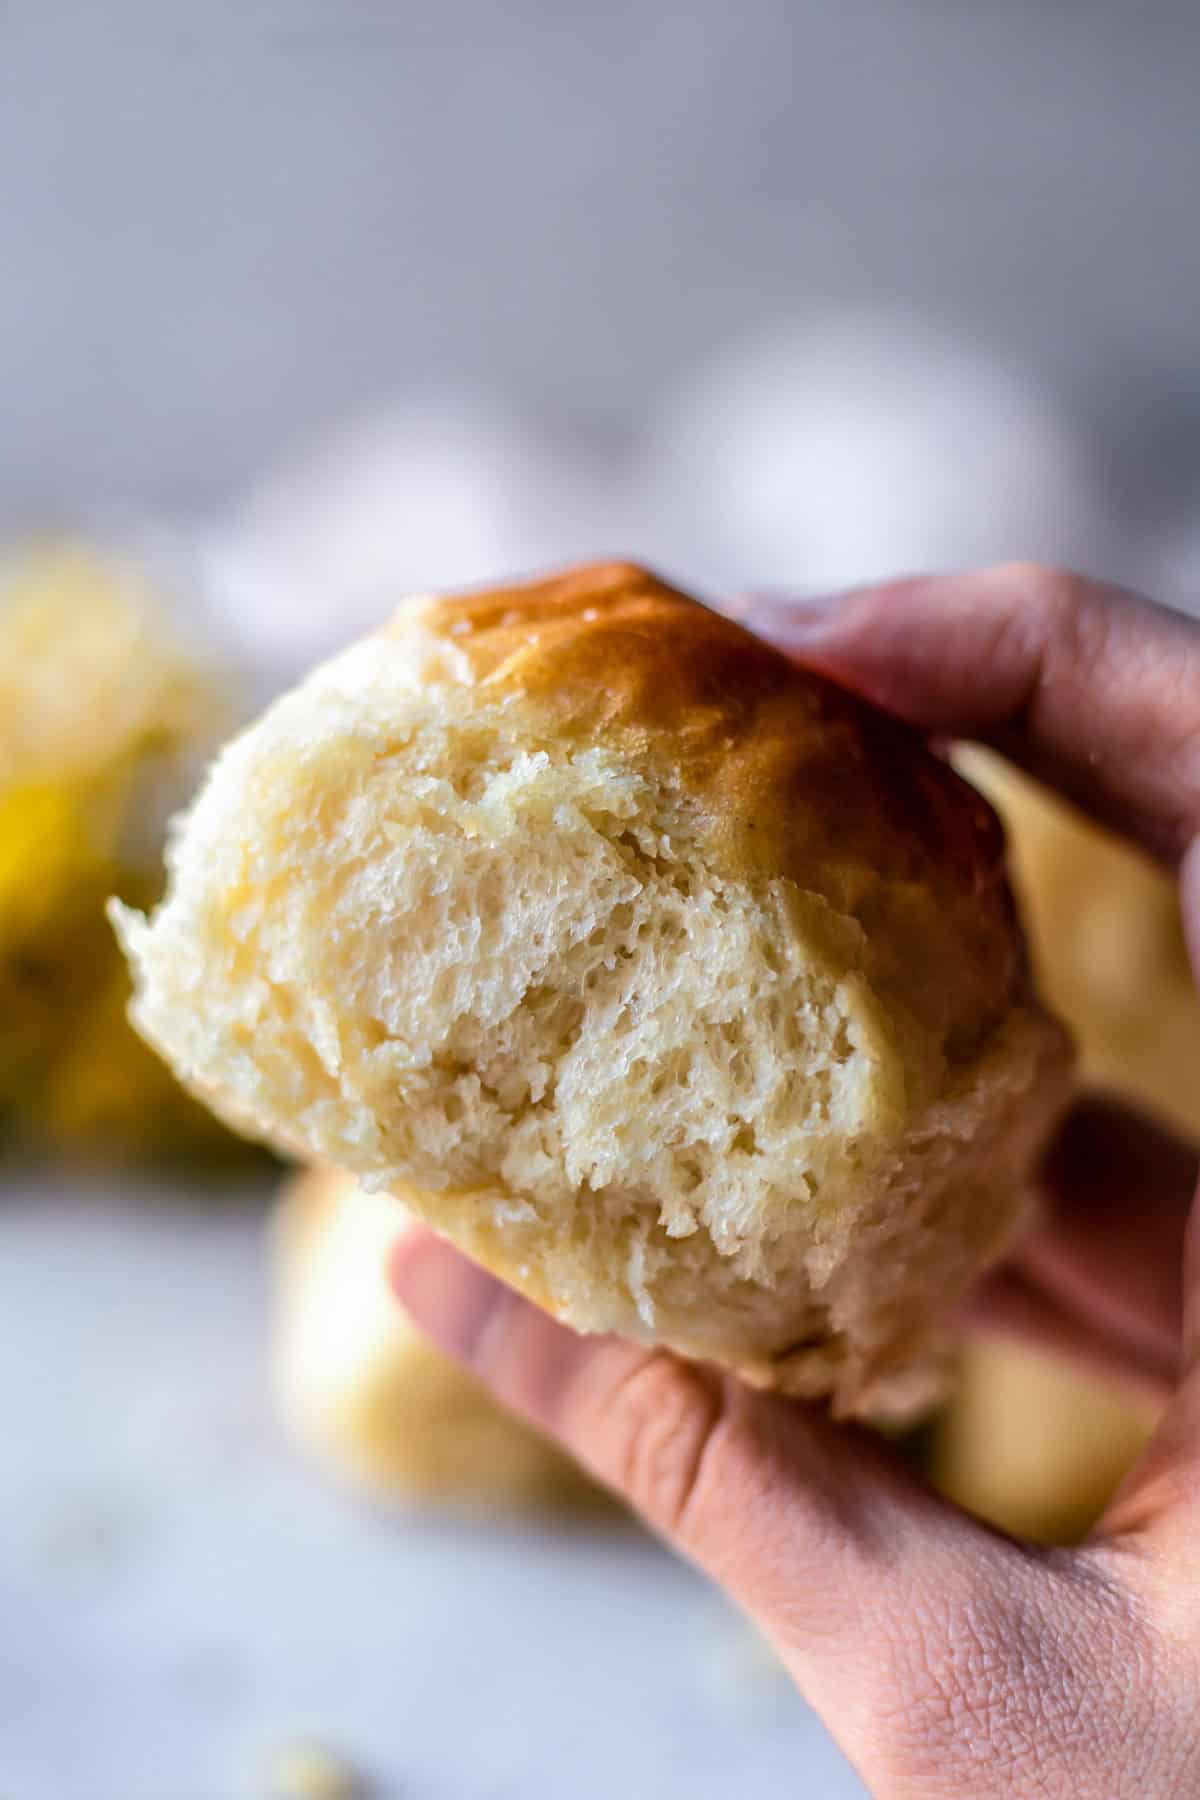
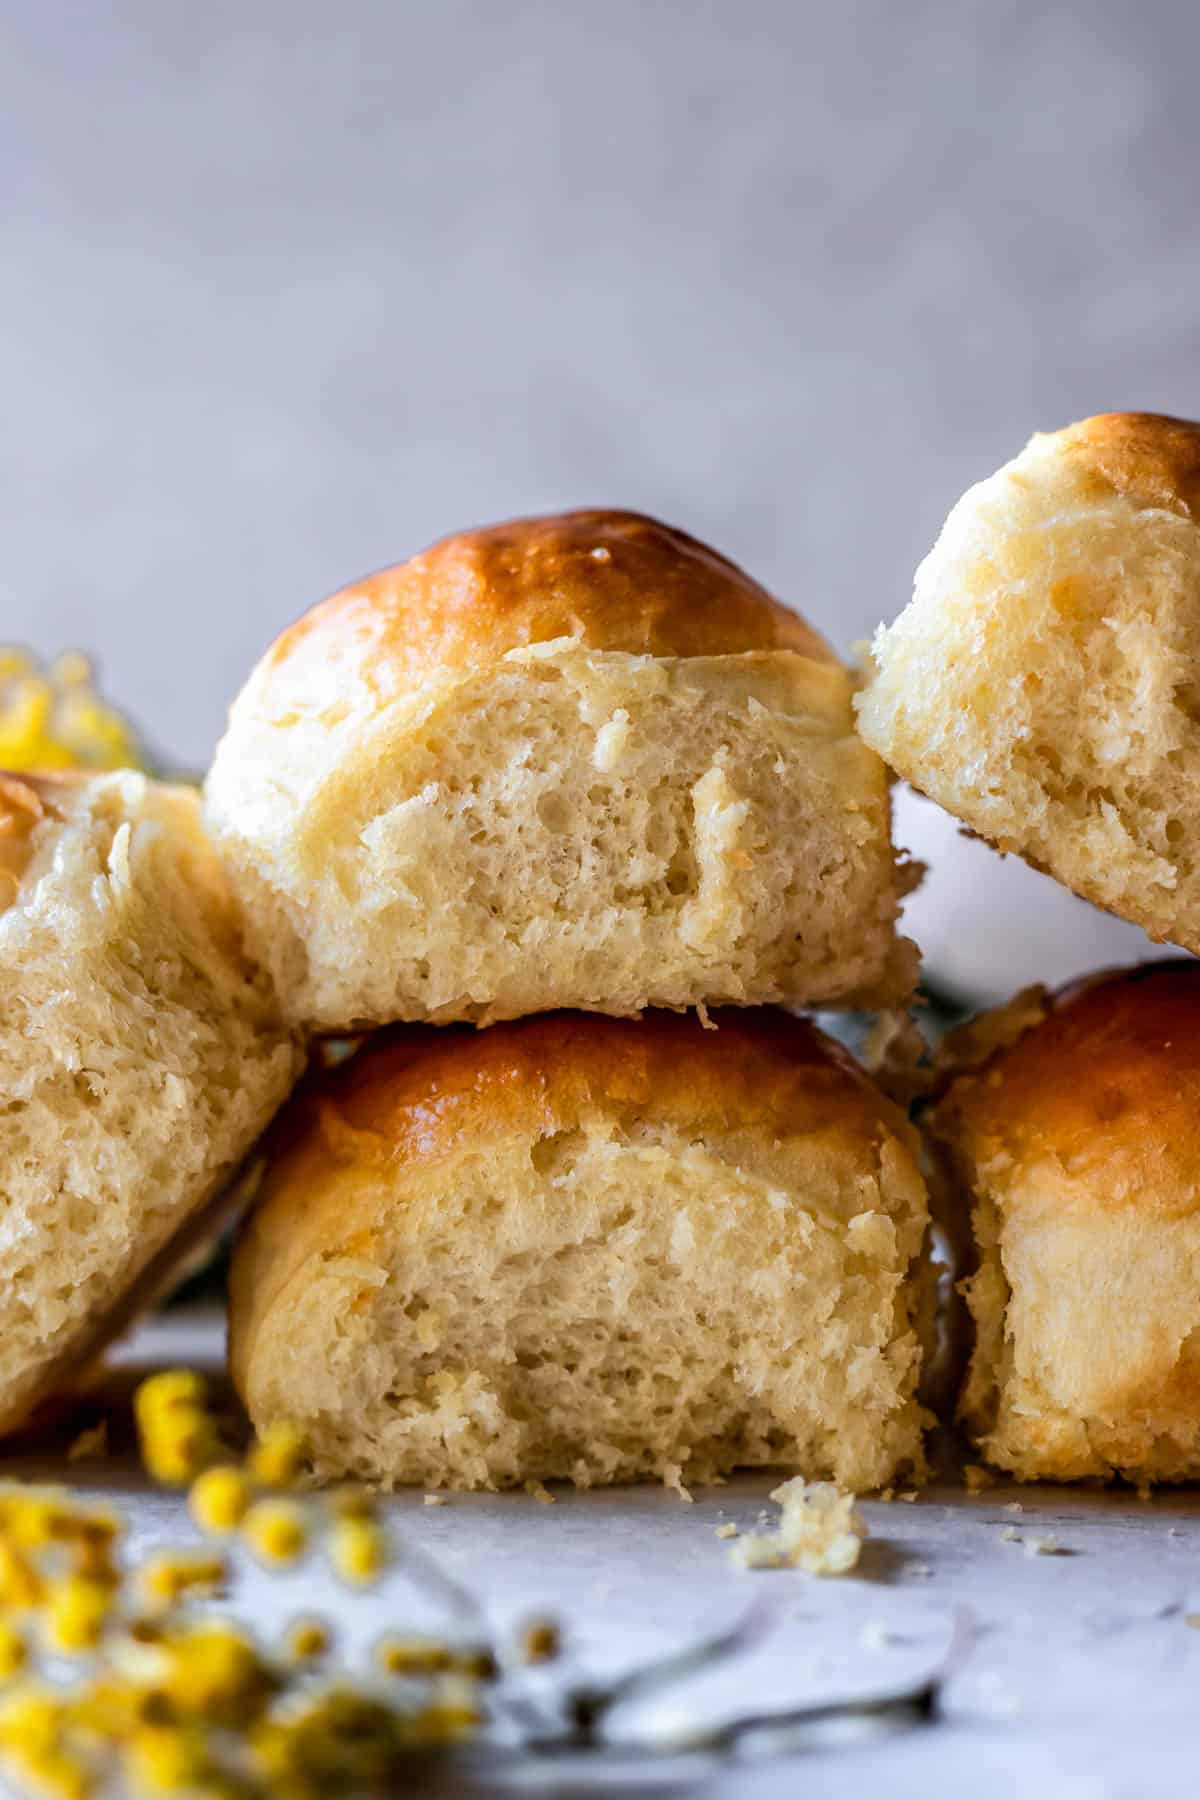
- Fluffy texture. You won’t even notice that they are gluten-free.
- Buttery. The flavor of these rolls is so buttery and slightly sweet
- Flaky on the top and extra soft in the center.
- Easy to make. These rolls are so easy to make and won't need any prior baking experience.
- Go well with both sweet and savory dishes. You can serve them alongside gravy or with jam.
- Vegan & Dairy-Free Option. With just a few simple substitutes you can make these rolls vegan or dairy-free
🧈 Ingredients and Substitutes
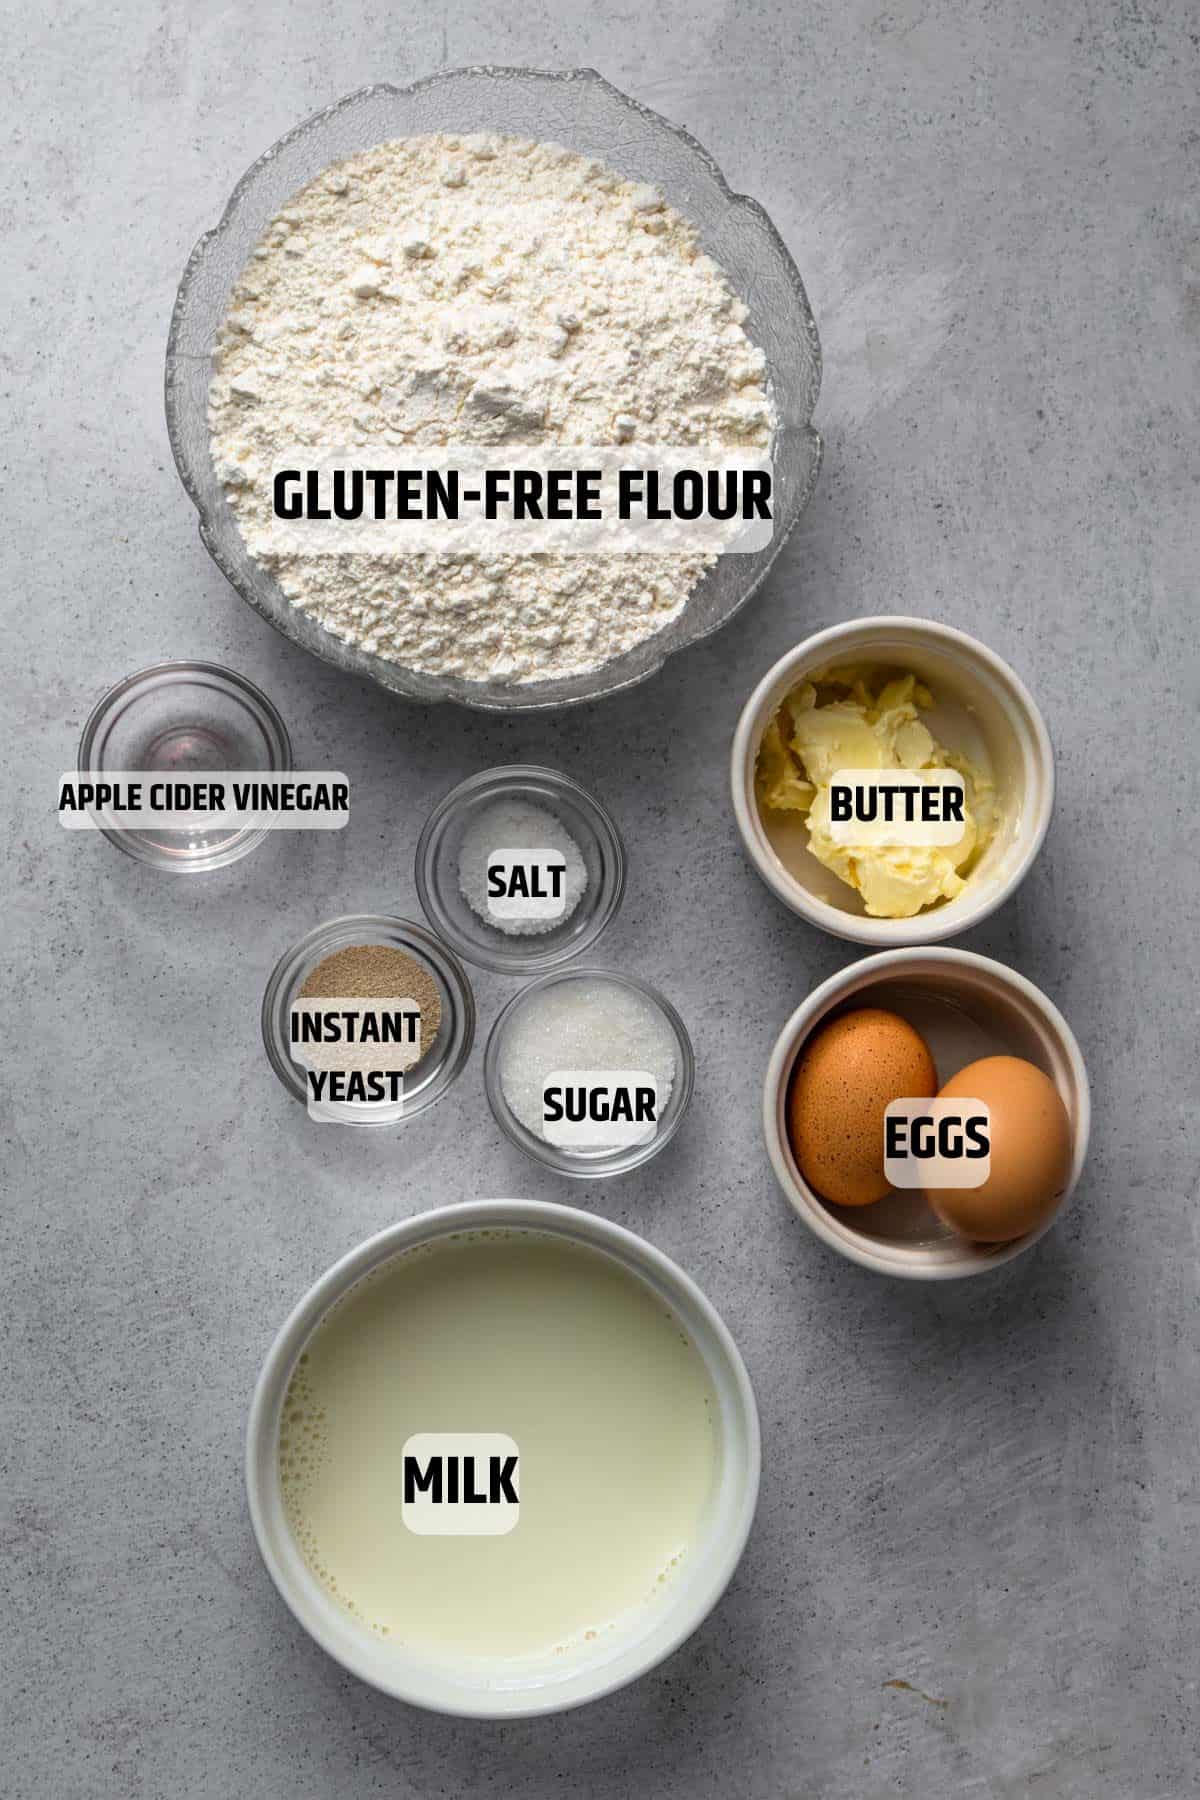
- Gluten-Free Flour. I recommend that you use this homemade gluten-free flour blend for the best results. However, if you can't make it or you want to use a store-bought blend such as King Arthur Measure for Measure Flour or Bob’s Red Mill. Regardless of which flour brand you choose to use, just make sure that it contains xanthan gum. Xanthan gum is the binding agent in gluten-free baking.
- Yeast. If you use active or instant yeast, you can add it directly to the dry ingredients. If you use fresh yeast, you will need to activate it in warm water with sugar.
- Sugar. I recommend that you don't omit the sugar because it is needed to activate the yeast. Instead of sugar, you can also use maple, honey, or agave syrup
- Milk. You can also use dairy-free milk
- Unsalted Butter. You can substitute butter for margarine or another plant-based alternative.
- Eggs. Eggs bind and hold the dough together. They are also the reason behind the fluffy texture. However, if you want to make them egg-free, you can use flax eggs instead. Simply mix ¼ cup water + 1 Tbsp. ground flaxseed and let it thicken for about 5 minutes. This is equal to one egg.
- Apple Cider Vinegar or Lemon Juice. The acid acts as a dough enhancer.
🥣 How to make these Gluten-Free Dinner Rolls
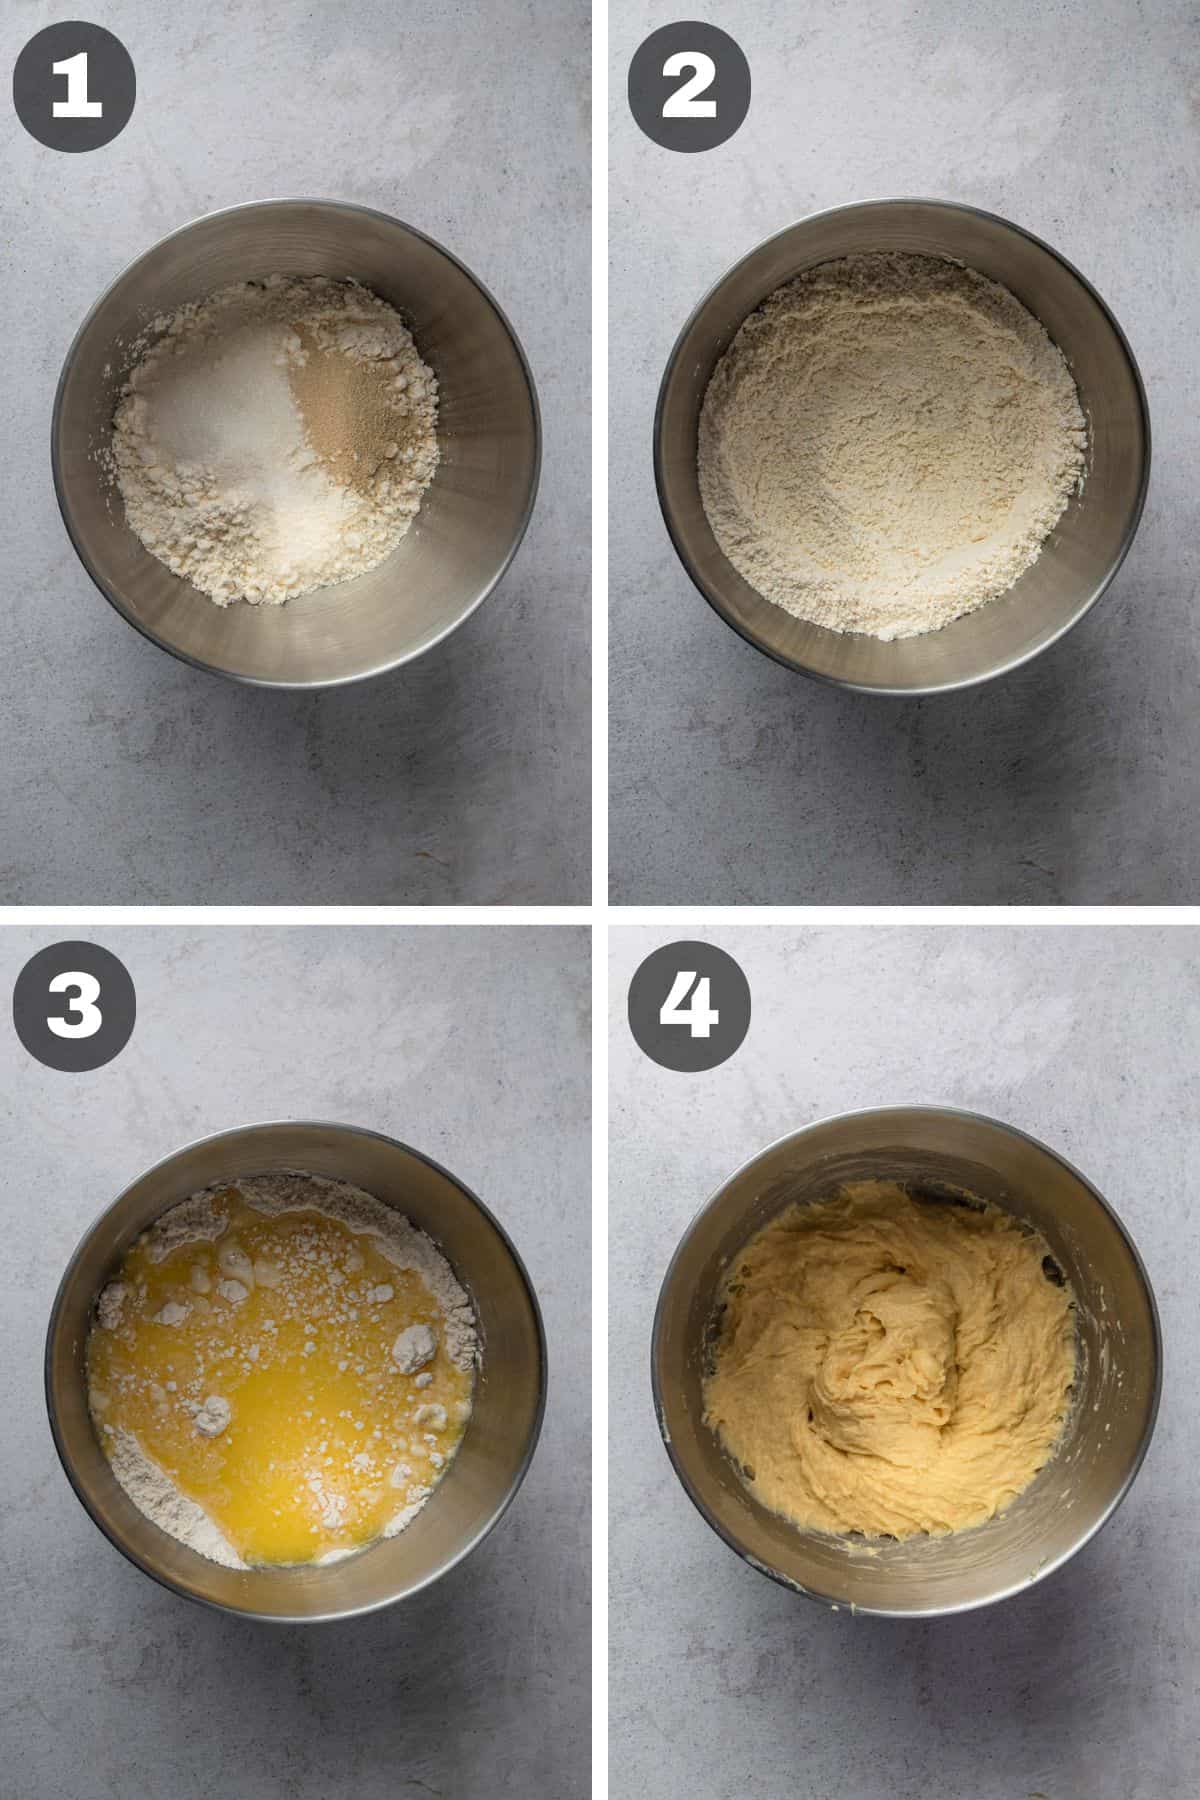
STEP 1 - MAKE THE DOUGH
In the mixing bowl of your electric mixer, mix gluten-free flour, instant yeast, sugar, and salt. Warm the milk to 110°F-115°F. It’s best to use a thermometer to check the temperature. If your milk is too hot it will kill the yeast. Pour warm milk over the yeast. Add the softened butter, eggs, and apple cider vinegar to the bowl and mix until fully combined (2-3 minutes).
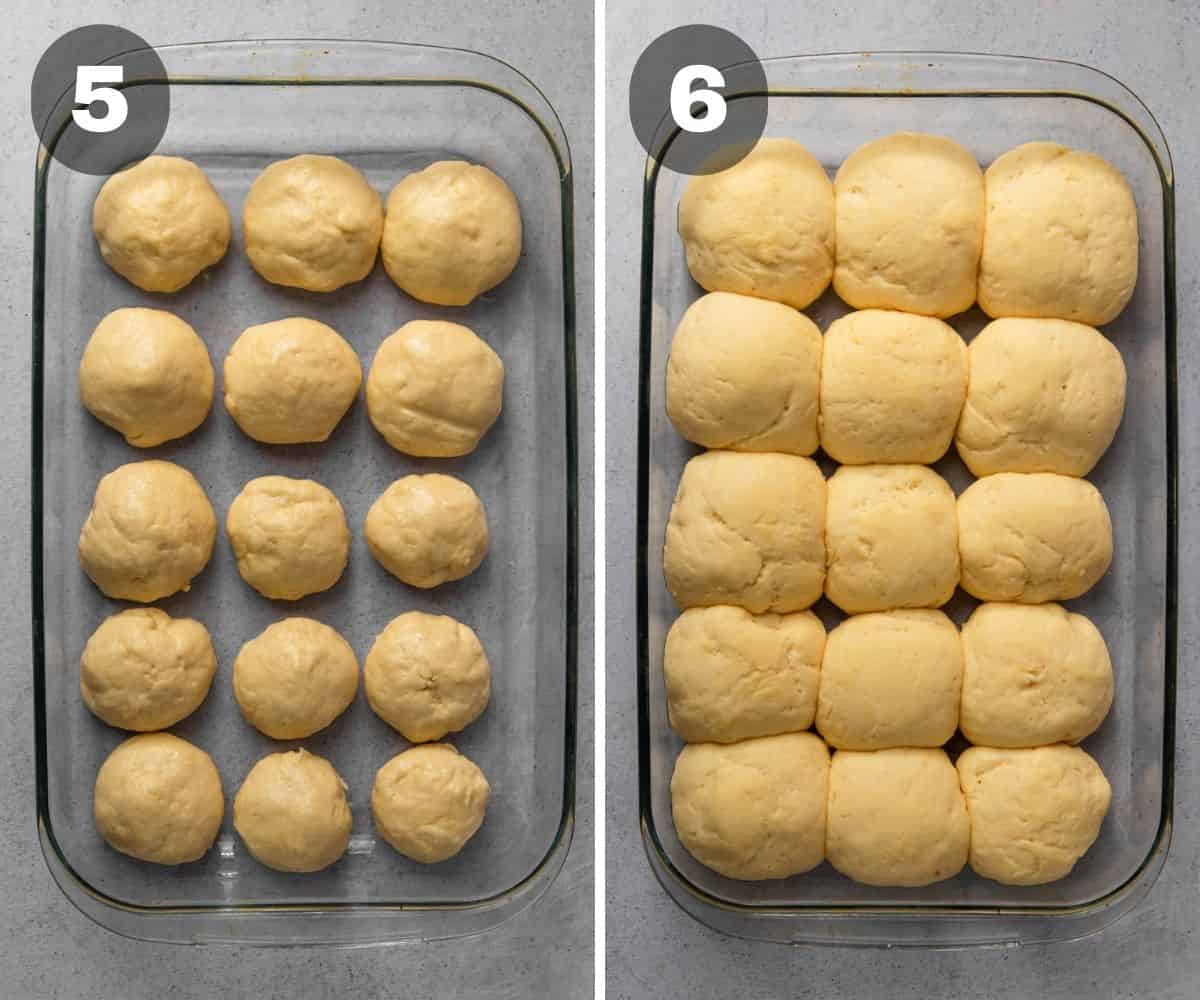
STEP 2 - SHAPE THE ROLLS
Grease a 9×13-inch baking pan or two 9-inch square or round baking pans. You can also bake the rolls in a cast-iron skillet or on a lined baking sheet. Using an ice cream scoop or spoon, scoop out the dough and with your hands roll it into a ball, Place the dough balls into the pans. Spray your ice cream scoop or spoon with gluten-free cooking spray to help the dough not stick. Take a small spatula and smooth out the tops of the dough. Cover the pan with a kitchen towel and allow it to rise in a warm place for 1 hour.
STEP 3 - BAKE THE ROLLS
Adjust the oven rack to a lower position and preheat the oven to 350°F (177°C). (I recommend that you bake the rolls towards the bottom of the oven so the tops don’t burn.) I like to spray them with a bit of water as they go into the oven, just to give them a bit of extra oven spring. Bake for about 25 to 30 minutes. The tops should be golden brown. Melt 2 tablespoons of butter and brush the tops of the rolls before serving.

👩🏻🍳 Expert Tips
- I recommend that you use a stand mixer fitted with a dough hook. The mixer makes the process much easier and the final dough will be much smoother. However, if you don't have a stand mixer you can also make the dough by hand. Just make sure to knead it thoroughly until smooth. Knead the dough for 5 minutes with a mixer or 8 minutes if kneading by hand. If you don't knead the dough until it is smooth it will affect the texture of your rolls.
- Don't add extra flour for shaping the rolls. The dough will be sticky and slightly wet but do not be tempted to add extra flour. You will not be kneading the dough by hand at all. Your mixer does all the work mixing the dough well. Once it is done mixing, then you use a large cookie scoop. If you add more flour, the rolls won't be as soft and fluffy instead they will have a more dense texture.
- Don't cut down all the sugar. Some of you might be avoiding sugar, however, I would not recommend that you cut down all the sugar. The sugar is needed to help activate the yeast.
- Measure the flour correctly. I would strongly recommend using a kitchen scale like this one, instead of cups. Being precise is very important in baking.
- Use the gluten-free flour mix that contains xanthan gum. Xantham gum is the binding agent in gluten-free baking. I recommend this homemade gluten-free flour blend for the best results. However, if you can't make it or you want to use a store-bought blend such as King Arthur or Bob’s Red Mill.
- Measure the temperature of the milk before adding it. Use a thermometer like this one to measure that the milk is at the right temperature, between 110°F-115°F before adding. Too cold and it won’t activate the yeast, too hot and it can kill the yeast.
- Make sure to let the rolls rise properly before baking. If it is colder where you live, you can use your oven at the lowest setting to help it rise fast.
💬 FAQ:
Yes, you can prepare them ahead of time. There are 2 options:
1. Prepare the dough and then keep it in the fridge overnight (in a closed container or in a covered bowl). You can then shape, proof, and bake the dinner rolls the next day.
2. You can make the dough and shape the rolls, and then keep the tightly covered baking tin in the fridge overnight. The next day, bring the rolls to room temperature, proof until they double in size, and then bake them.
I don’t recommend keeping the dough in the fridge for longer than one day.
Like with most gluten-free baked goods, these are at their very best on the day of baking. However, they would last for 2-3 days in a closed container. You can reheat them in the microwave or the oven.
You can freeze them. When you want to have some, take them out and reheat them in the oven for 10 minutes at 350°F (180°C).
Yes, to make them dairy-free substitute the milk and the butter for a plant-based alternative. Then make them completely vegan, substitute the eggs for 2 flax eggs.
🥘 Recipes to serve these rolls with:
🍞 More Gluten-Free Bread Recipes
Did you make these rolls? Tell me about it! Leave a ⭐ REVIEW and COMMENT below!
Recipe

Gluten-Free Dinner Rolls
Ingredients
- 3 cup gluten-free flour
- 1 teaspoon salt
- 2 teaspoon instant yeast
- 2 eggs (at room temperature)
- ¼ cup unsalted butter (sofetened) you can also use dairy-free
- 1 ¼ cup milk (at room temperature) you can also use lactose-free or dairy-free
- 2 tablespoon sugar
- 1 teaspoon apple cider vinegar (or lemon juice)
Instructions
- In the mixing bowl of your electric mixer, mix together gluten-free flour, instant yeast, sugar, and salt.Warm the milk to 45°C (115°F). I use a thermometer to check the temperature. If your milk is too hot it will kill the yeast. Add the milk together with the softened butter, eggs, and apple cider vinegar to the bowl with the flour mixture and mix until fully combined
- Grease a 9×13 inch baking pan or two 9-inch square or round baking pans. You can also bake the rolls in a cast-iron skillet or on a lined baking sheet.
- Using an ice cream scoop place the dough balls into the pans. Spray your ice cream scoop with gluten-free cooking spray to help the dough not stick. Take a small spatula and smooth out the tops of the dough.
- Cover the pan with a kitchen towel and allow to rise in a warm place for 1 hour.
- Adjust the oven rack to a lower position and preheat the oven to 350°F (177°C). (It’s best to bake the rolls towards the bottom of the oven so the tops don’t burn.)
- Bake for about 25 to 30 minutes. Tops should be golden brown.
- Melt 2 tablespoons of butter and brush the tops of the rolls before serving.
- Cover leftover rolls tightly and store at room temperature for 2-3 days or in the refrigerator for up to 1 week.
Notes
- I recommend that you use this homemade gluten-free flour blend for the best results. However, if you can't make it or you want to use a store-bought blend such as King Arthur Measure for Measure Flour or Bob’s Red Mill. Regardless of which flour brand you choose to use, just make sure that it contains xanthan gum. Xanthan gum is the binding agent in gluten-free baking.
- Yeast. If you use active or instant yeast, you can add it directly to the dry ingredients. If you use fresh yeast, you will need to activate it in warm water with sugar.
- I recommend that you use a stand mixer fitted with a dough hook. The mixer makes the process much easier and the final dough will be much smoother. However, if you don't have a stand mixer, you can also make the dough by hand. Just make sure to knead it thoroughly until smooth. Knead the dough for 5 minutes with a mixer or 8 minutes if kneading by hand. If you don't knead the dough until it is smooth it will affect the texture of your rolls.
- Don't add extra flour for shaping the rolls. The dough will be sticky and slightly wet, but do not be tempted to add extra flour. You will not be kneading the dough by hand at all. Your mixer does all the work mixing the dough well. Once it is done mixing, you use a large cookie scoop. If you add more flour, the rolls won't be as soft and fluffy instead, they will have a more dense texture.
- Don't cut down all the sugar. Some of you might be avoiding sugar, however, I would not recommend that you cut down all the sugar. The sugar is needed to help activate the yeast.
- Measure the flour correctly. I would strongly recommend using a kitchen scale like this one, instead of cups. Being precise is very important in baking.
- Measure the temperature of the milk before adding it. Use a thermometer like this one to measure that the milk is at the right temperature, between 110°F-115°F before adding. Too cold and it won’t activate the yeast, too hot and it can kill the yeast.
- Make sure to let the rolls rise properly before baking. If it is colder where you live, you can use your oven at the lowest setting to help it rise fast.
Dany says
I made your recipe yesterday and I absolutely loved it!! These were the softest GF dinner rolls that I've ever tried! Thank you!
Linda says
These turned out so good! I've missed soft dinner rolls! Thank you so much.
Sarah says
How much apple cider vinegar should be added? You list two different amounts. Thanks!
Gluten Free Stories says
I'm sorry for that. It is 1tsp apple cider vinegar.
Elizabeth says
What gluten free flour did you use?
Becky says
How much flour by weight is needed? You said it's best to you a scale but only listed by cups in the recipe.
Stephanie says
These look amazing! I struggle to get the gf bread dough to rise. Need to try this out!
Britt says
These are so good! New family favorite!
Britt says
I forgot to mention in my comment...I call these "labor rolls"! I made them on Thanksgiving this year while I was in labor with my son! They're that easy to make! I've made them 3 times since and they've worked out wonderfully every time!
Gluten Free Stories says
Hi Britt, I'm so happy to hear that!
Barbara says
I am using King Arthur GF flour. I do have the xanthum gum. How much xantham gum do I use to bake these successfully? I will make your blend in the future, after using up the bags of KA flour.
I did use the KA site’s recipe for Thanksgiving, but that recipe is more biscuit-y (which is stated in the recipe), and while we like it, we’d like “genuine” hot rolls for Christmas. And the biscuit-y ones for soup or chili.
We’re just going GF, and I am inexperienced in the GF life. Thank you for your reply.
Gluten Free Stories says
Hi Barbara, you should use 1 1/2 tsp xantham gum for this recipe.
Barbara says
Thank you!!!
Erica says
Wait … what? There is no xantham gum listed in the ingredients. They’re currently rising now. Hope they come out!
Denise says
Can I use Gluten-free bread flour for this recipe?
Chivana Thomas says
Is there an alternative to apple cider vinegar?
Gluten Free Stories says
Yes, you can use white vinegar, white wine vinegar or lemon juice
liz says
I made these today and strictly followed the recipe, but the batter was practically liquid. Had to add twice as much flour to try and achieve a non-sloppy batter. Is 300ml the correct amount of liquid to use?
Gluten Free Stories says
Hi Liz, I'm sorry to hear that. Yes it is 300ml of liquid. Did you use gluten-free flour with xanthan gum?
Erica says
Luckily, my King Arthur Flour for Flour mixture has xanthum gum (because it’s not listed in the ingredients). Also, can I make a suggestion… I skipped the narrative and went right to the recipe. You don’t indicate in the recipe that you have to “knead the dough for 5 minutes with a mixer, 8 by hand.” I think that explains why my rolls look like the regular “crunchy” gf/biscuit-y rolls rather than the nice brown, smooth dinner rolls in the photos. Also, have no idea how you go that nice brown shade on top. Mine have the standard gf light brown. The good news is they smell delicious! So even though they look like gf biscuits, hopefully they will taste good for my sliders and that’s all that matters! 🙂
Gluten Free Stories says
Hi Erica, I explain in the article what type of gluten-free flour should be used and also explain the process of making the recipe and all the tips for getting the best results. I will include the information for how long to knead the dough in the recipe card so there is no confusion in the future. Regarding the golden brown shade on top, sometimes I brush them with egg wash. It's not necessary for the recipe but it can make the rolls look prettier. I will include that in the recipe as well. I hope that you will still enjoy them 🙂
Nate says
These rolls are amazing, if I find that they almost blend together while rising. Is my batter too runny? Any tips on getting more separated rolls
Kailey says
I did a half batch and it only filled a little less than half of a 9x9. I think because there wasn’t enough cushion for the pushin, or support on all sides, of the biscuits they didn’t rise as much. They looked like they blended together until they were don’t they pulled apart easy. So I’m going to try putting the scoops of dough in a muffin tin. 2 scoops in each muffin tin. That may help
Allison says
Delicious! They turned out beautifully. Best GF rolls ever!
Loretta Sherrets says
Can I double the recipe? Do I need to adjust anything?
Stefani Weiss says
Yes you can, no need to change anything.
Mona Rita says
Can you freeze them
Carla Chiarelli says
Can you use coconut milk?
Ashley says
I've noticed anything using dairy milk can be replaced with coconut milk. it worked perfectly in this recipe too, just tried it!
Randy Whitledge says
Do these rolls freeze well?
Kailey says
Made these and they taste amazing! Soft and chewy like regular bread, not dry and flaky ! Don’t be scared to try this recipe if you can’t afford the expensive flour. I did a half batch and measured with the scale. The only differences/or specifications to add would be I used buttermilk, and bobs red milk 1-1 baking flour (already has xanthin gum). I followed the recipe!
Kailey says
Made these and they taste amazing! Soft and chewy like regular bread, not dry and flaky !Don’t be scared to try this recipe if you can’t afford the expensive flour. I did a half batch and measured with the scale. The only differences/or specifications to add would be I used buttermilk, and bobs red milk 1-1 baking flour (already has xanthin gum). I followed the recipe!
Wendy says
Do you recommend using King Arthurs bread flour or Cup for Cup GF flour? both have xanthem gum.
Stefani Weiss says
Both work well.
Cherray says
Can you make these a day ahead and warm them in the oven the next day?
Stefani Weiss says
Yes you can, however they taste the best when they are freshly baked.
Nadia says
I just made these, they were the best dinner rolls I’ve had since going gluten free! Thank you for this recipe 🙏