
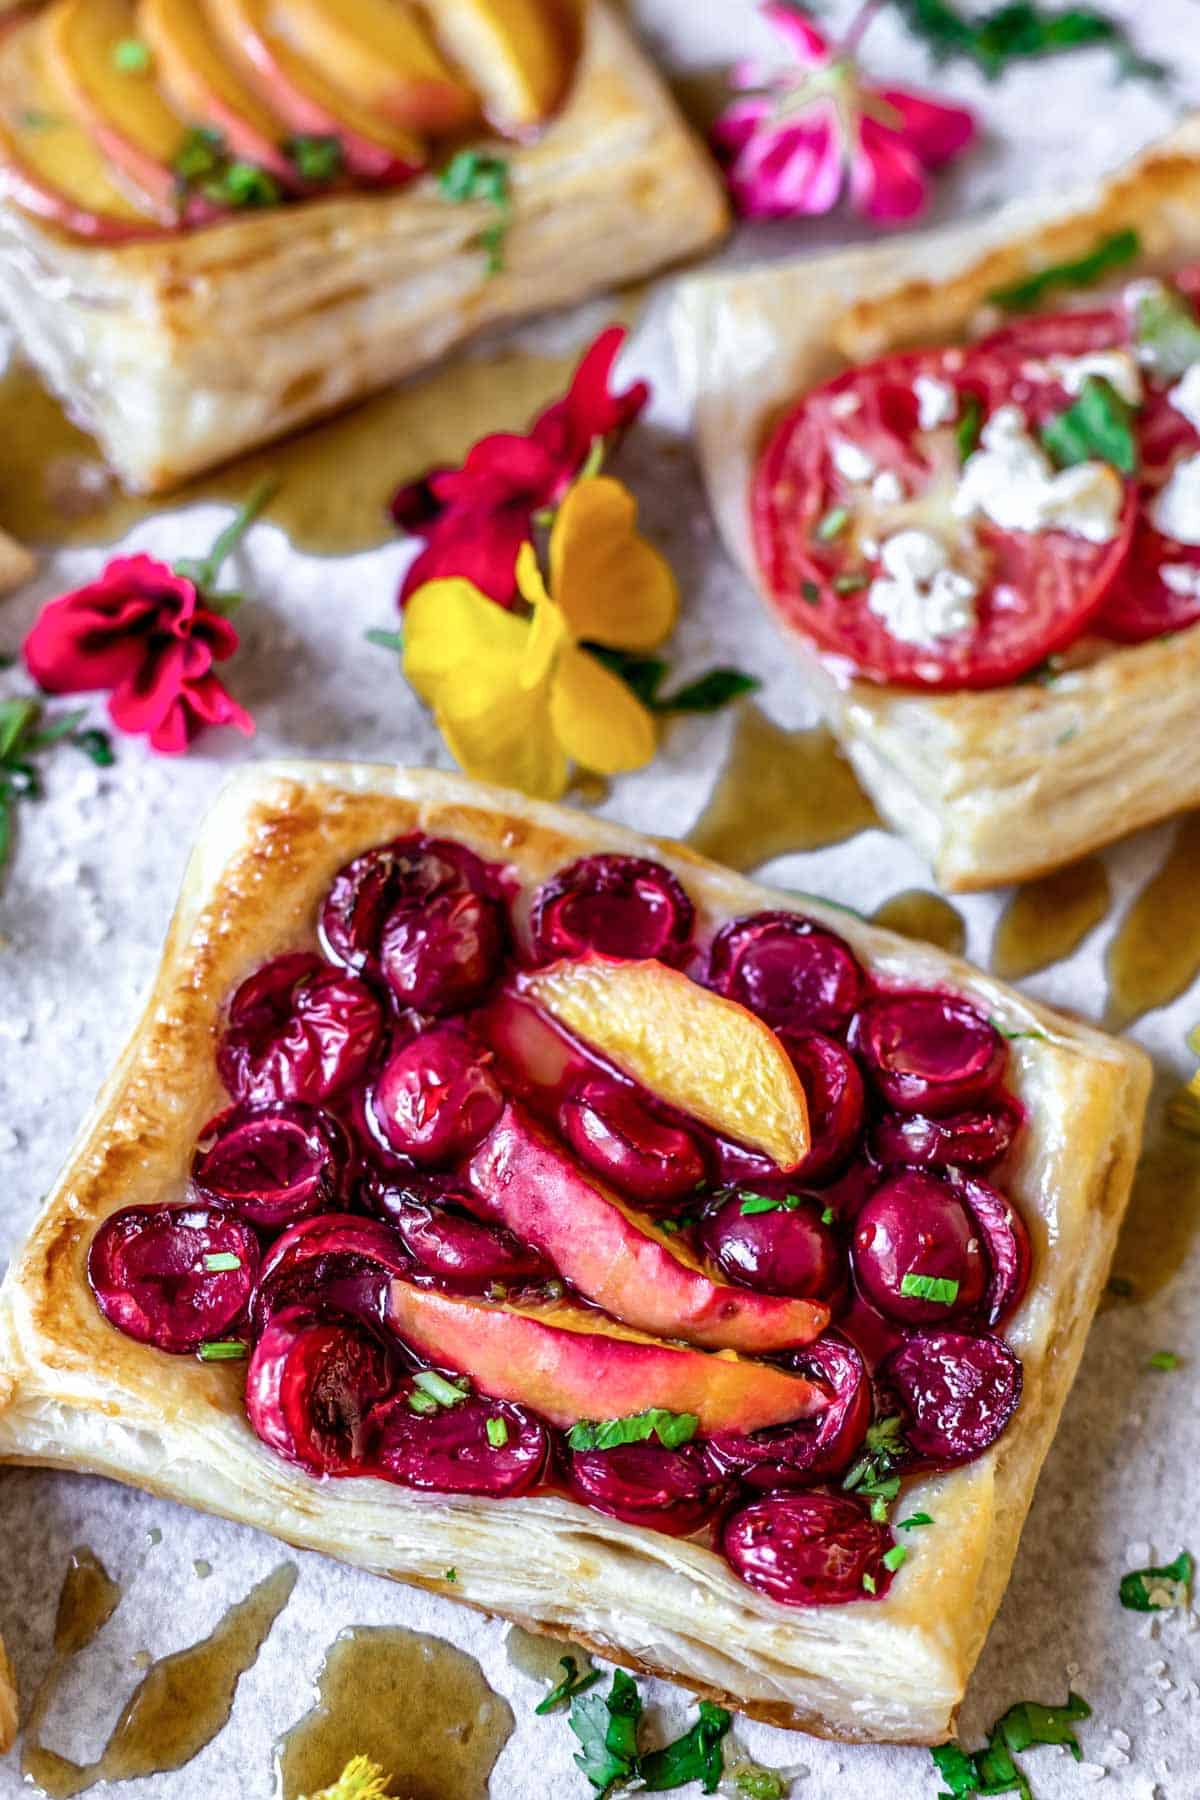
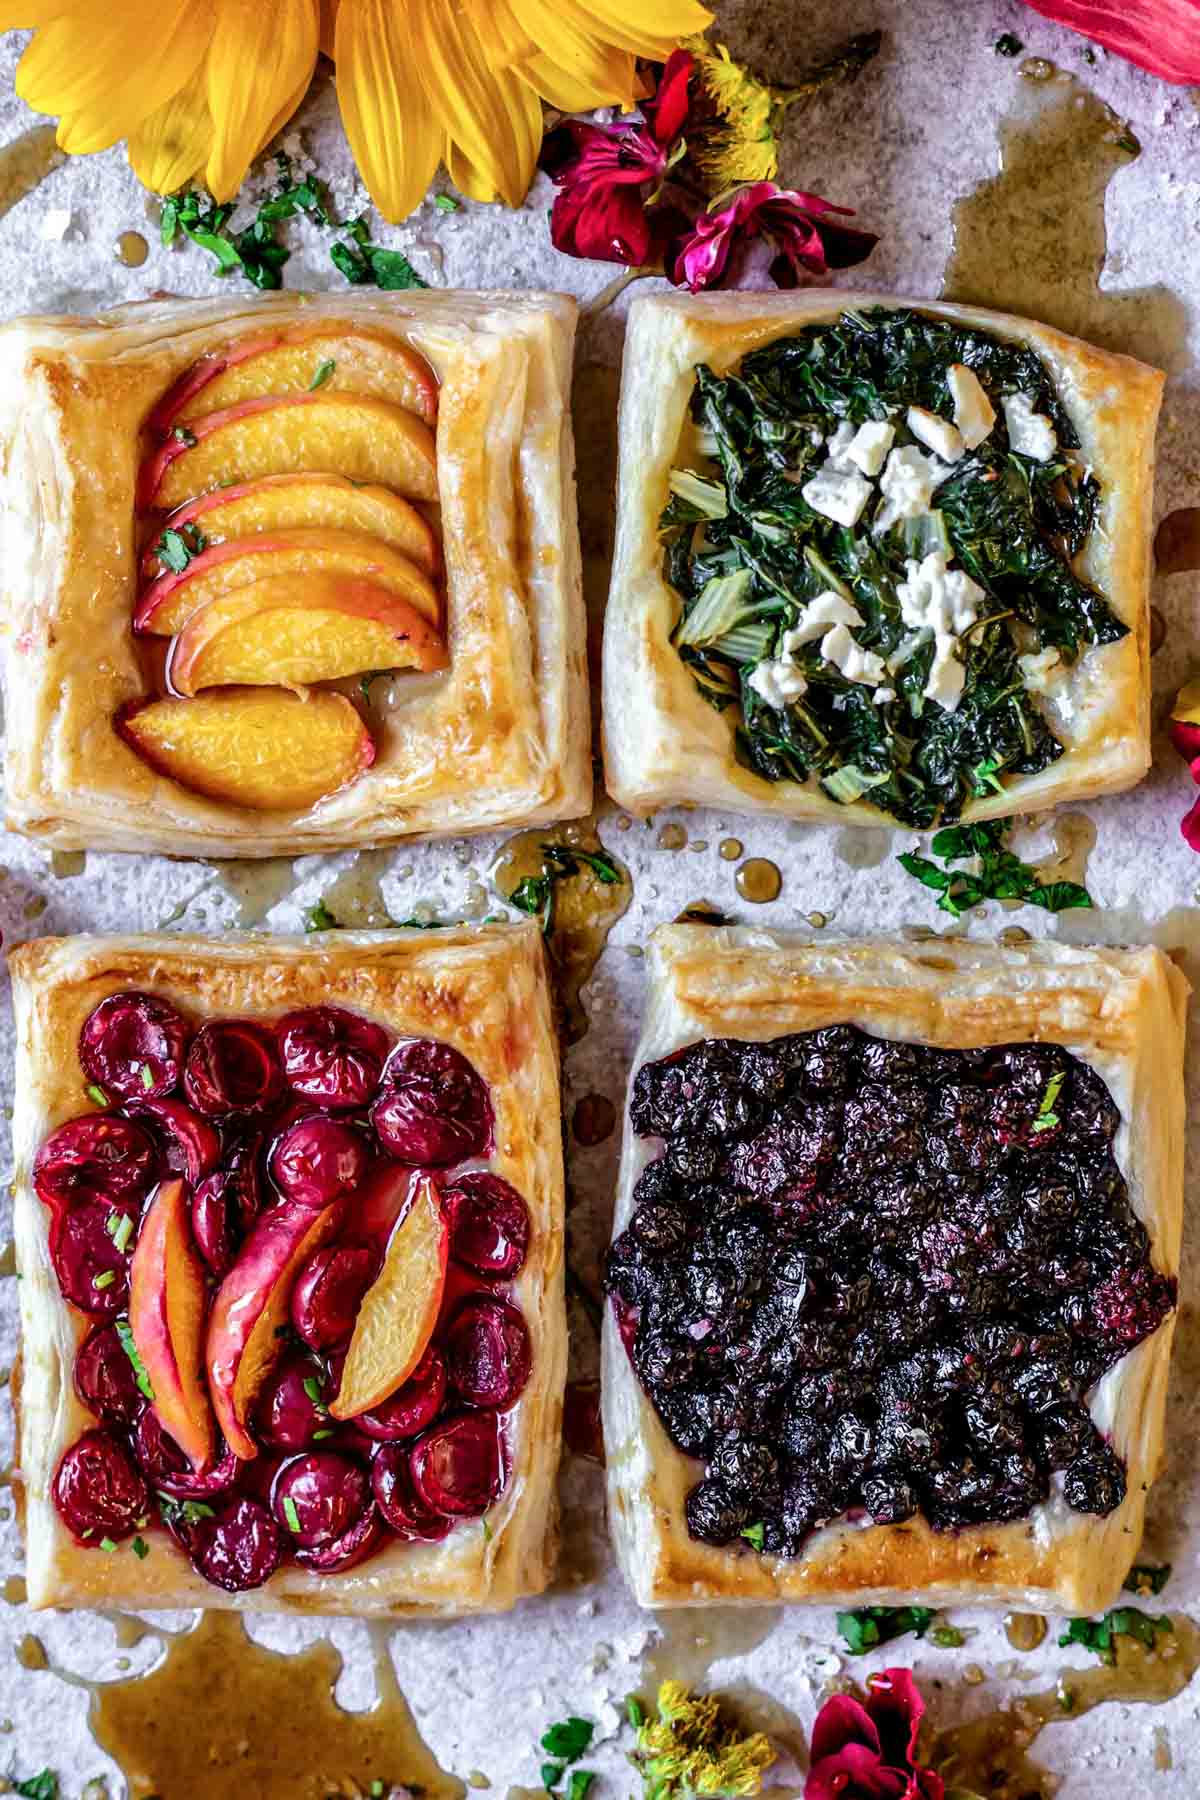
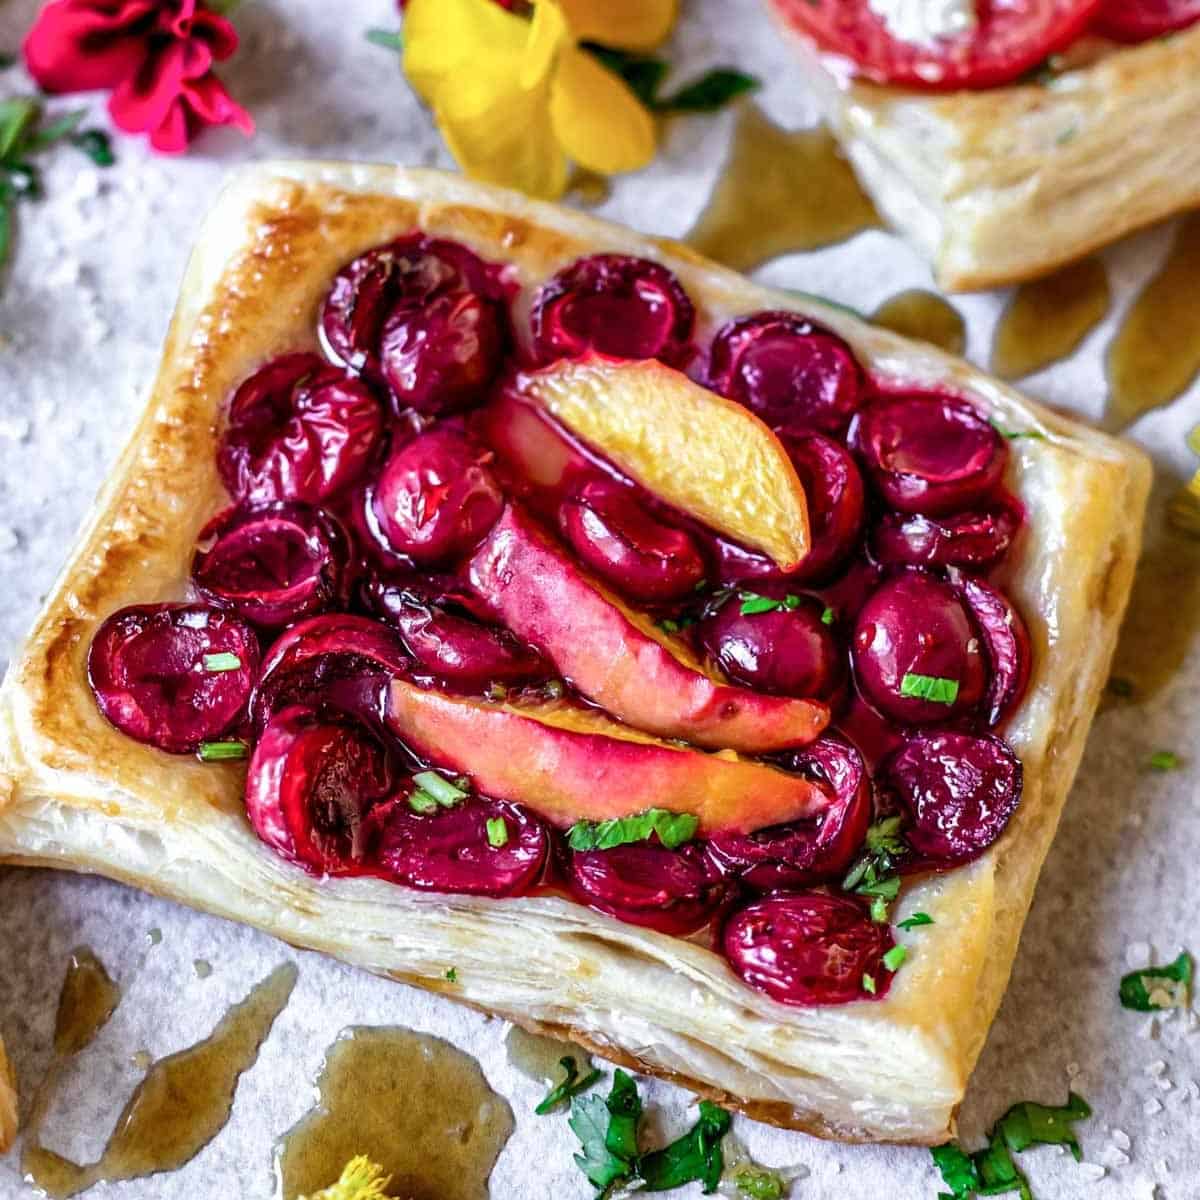
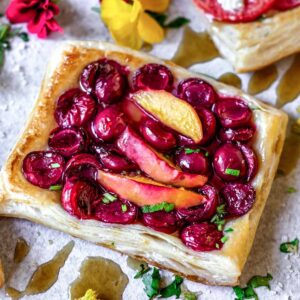
This gluten-free puff pastry is authentic, buttery, incredibly flaky, and perfectly tender. It puffs up so beautifully in the oven and you won’t be and to tell that is it gluten-free. The recipe is very easy to make and is 100% fail-proof.
Why this is the best gluten-free puff pastry on the internet
- Real deal puff pastry. This recipe uses the traditional method of making a puff pastry which results in extra light and fluffy pastry with infinite flaky layers.
- Fail-proof. I have tested this recipe so many times and I can guarantee that it is 100% reliable and fail-proof. Just make sure to keep the dough chilled and use a rolling pin and I can ensure that you will get the loveliest and most flaky puff pastry.
- Easy to make. Puff pastry might sound intimidating, but this recipe is quite simple and easy to make. If you can make gluten-free pie crust then you can make gluten-free puff pastry. You will just need to have a little bit more patience.
Traditional vs Gluten-free Rough Puff Pastry
The traditional recipe uses a cold butter packet that is wrapped in a gluten-free pastry dough. It requires to be rolled and folded multiple times, which is called “turns” and chilled between each turn.
Rough puff pastry is also knowns as flaky pastry and instead of wrapping a large slab of butter, you break the butter into small pieces before combining it with the flour. Rough puff pastry contains less fat which results in a pastry that is not as light and fluffy.
Ingredients
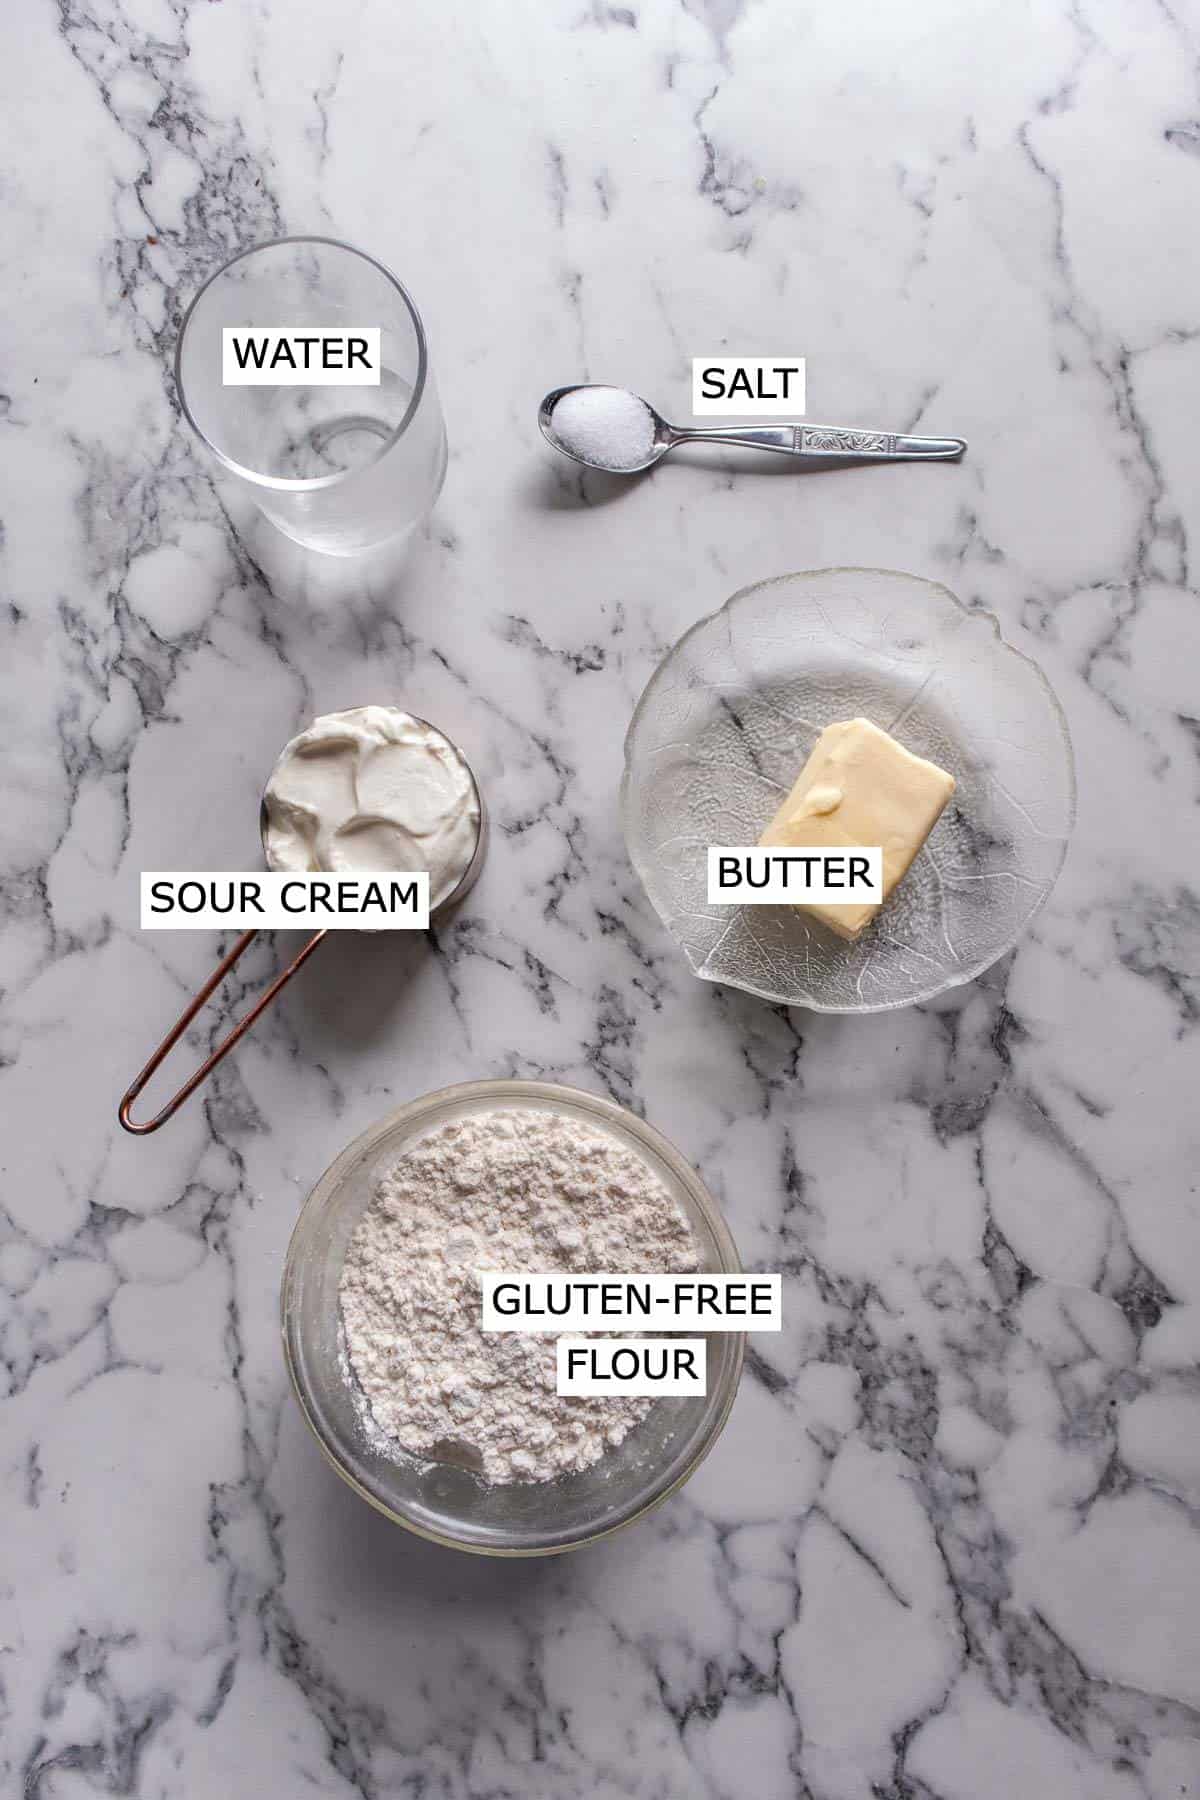
Gluten-free flour. I recommend using Better Batter GF multipurpose Flour or Cup4Cup GF multipurpose flour. If you are from Europe you can use Schar Mix B. If you can’t find any of these flour mixes you can make my gluten-free flour mix or use any gluten-free flour blend that contains xanthin gum. Note that all gluten-free flour blends are not the same and therefore you might have slightly different results if you use any flour blend that is not recommended here.
Cold Full Fat Sour Cream. I have discovered that making the gluten-free pastry dough with sour cream produces puff pastry that is so much more light and fluffy. I used to make this recipe using pastry dough made with butter, but once I tweaked it and substitute the butter for sour cream I can promise you it got 10 times better. If you want to make dairy-free puff pastry you can use plant-based sour cream. Moreover, gluten-free flour blends have higher water absorption capacity. This means they need more wet ingredients to prevent the dough from tearing. I have discovered that gluten-free pastry dough is a lot easier to shape and handle when made with sour cream in place of butter and cold water. Sour cream provides both moisture and fat.
Cold Butter. For making vegan puff pastry substitute regular butter for a plant-based alternative.
Ice cold water. It is very important to use ice-cold water to help keep the sour cream and butter as cold as possible.
Salt.
How to make gluten-free puff pastry
Puff pastry is in the category of doughs called “laminated” doughs.
What is “laminated dough”?
Laminated dough means that the dough is made of layers. A block of butter is wrapped with pastry dough and then rolled and folded multiple times which creates layers of dough separated with butter. When puff pastry goes into the oven the butter melts which prevents the layers of dough to stick together and you end up with a super light, crisp, and flaky pastry.
Making Laminated doughs involve three steps:
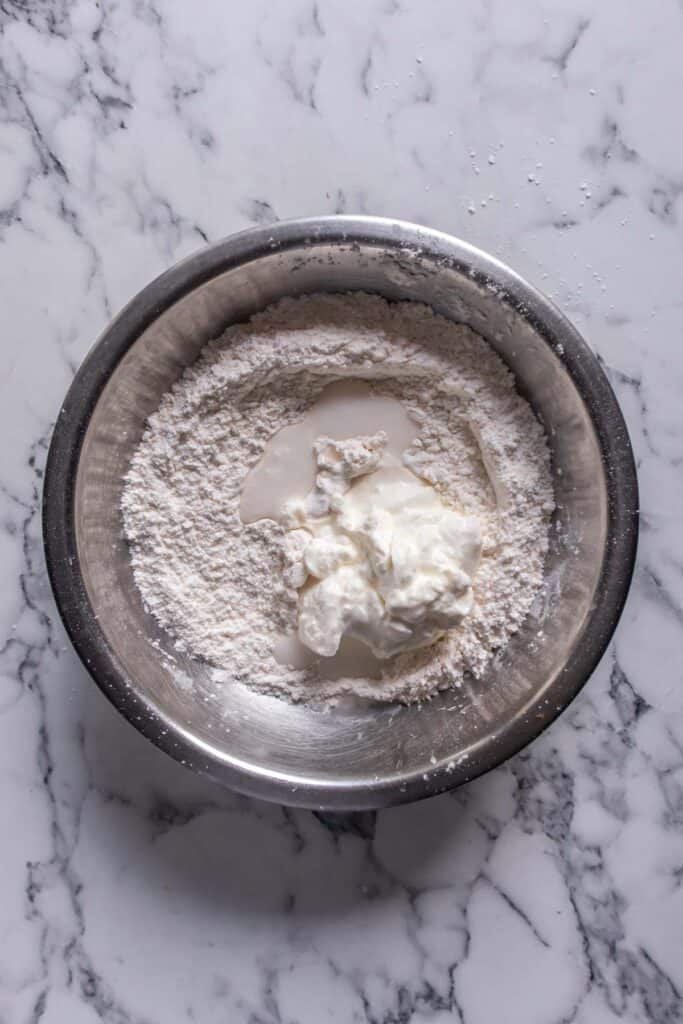
Step 1: Prepare the gluten-free pastry dough détrempe;
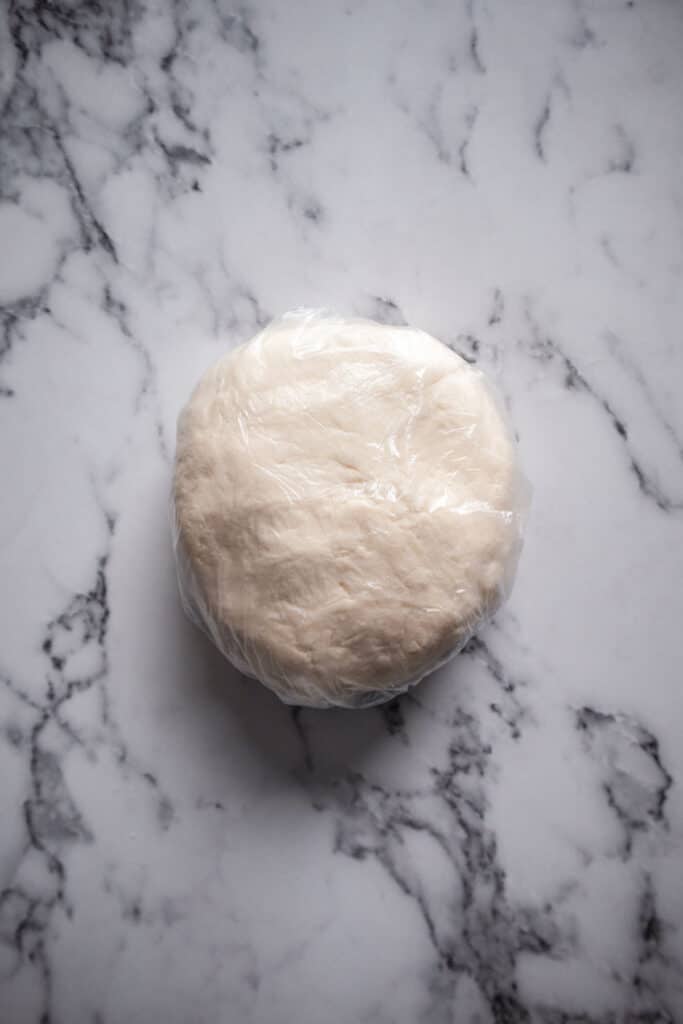
In a large mixing bowl, stir together flour and salt. Add the water and sour cream and stir the mixture until it comes together. The dough should hold together well but shouldn't be wet and sticky (if it is crumbly add more water if it is too wet add more flour). Wrap the dough in foil and place it in the fridge.
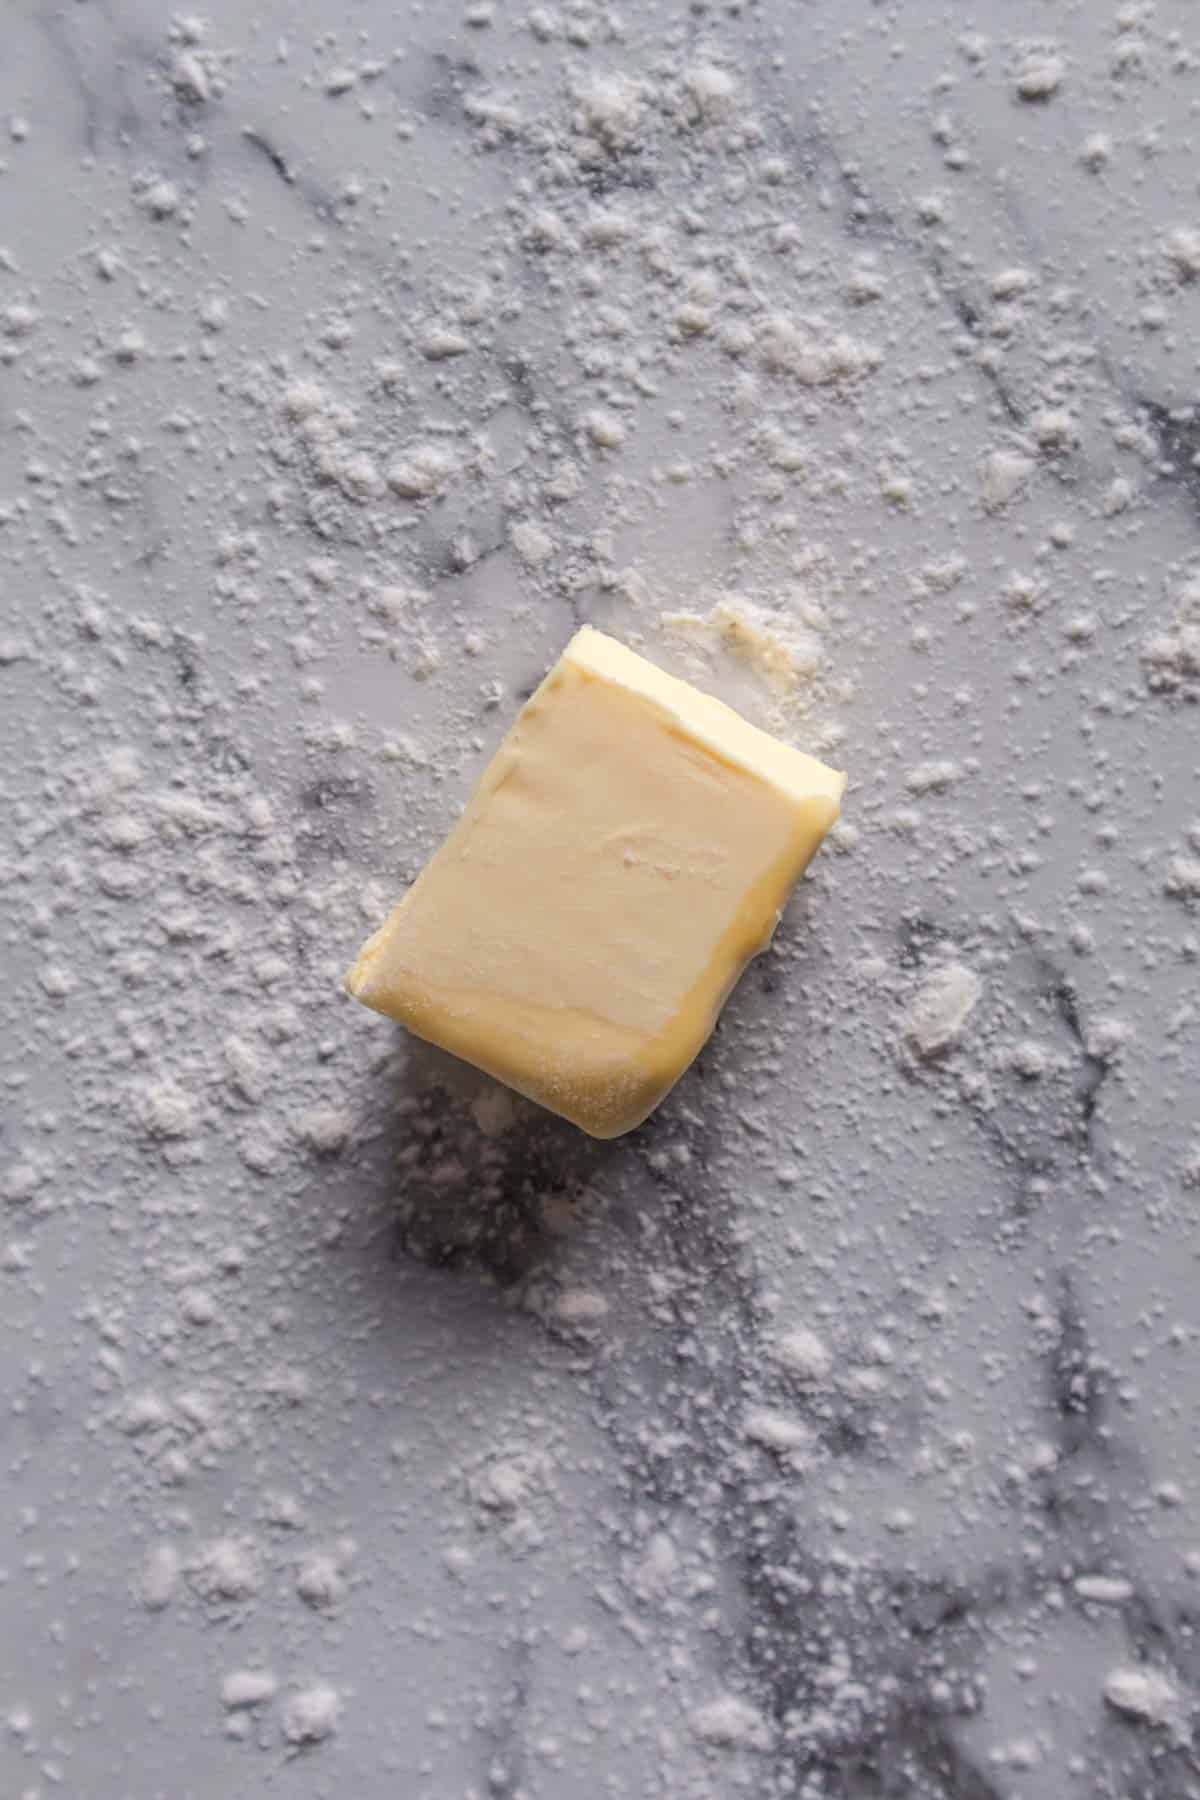
Step 2: To make the butter packet
Using your rolling pin, beat the butter into an evenly-thick square. You may need to mess around with it a bit to get this into a uniform thickness. Set the butter packet aside. It should be cold and firm but not hard (also, if it’s getting too soft, put it in the refrigerator) while you roll out your dough.
Step 3: Wrap the butter packet inside the dough.
This is essentially a fat pocket that gets folded in the dough.
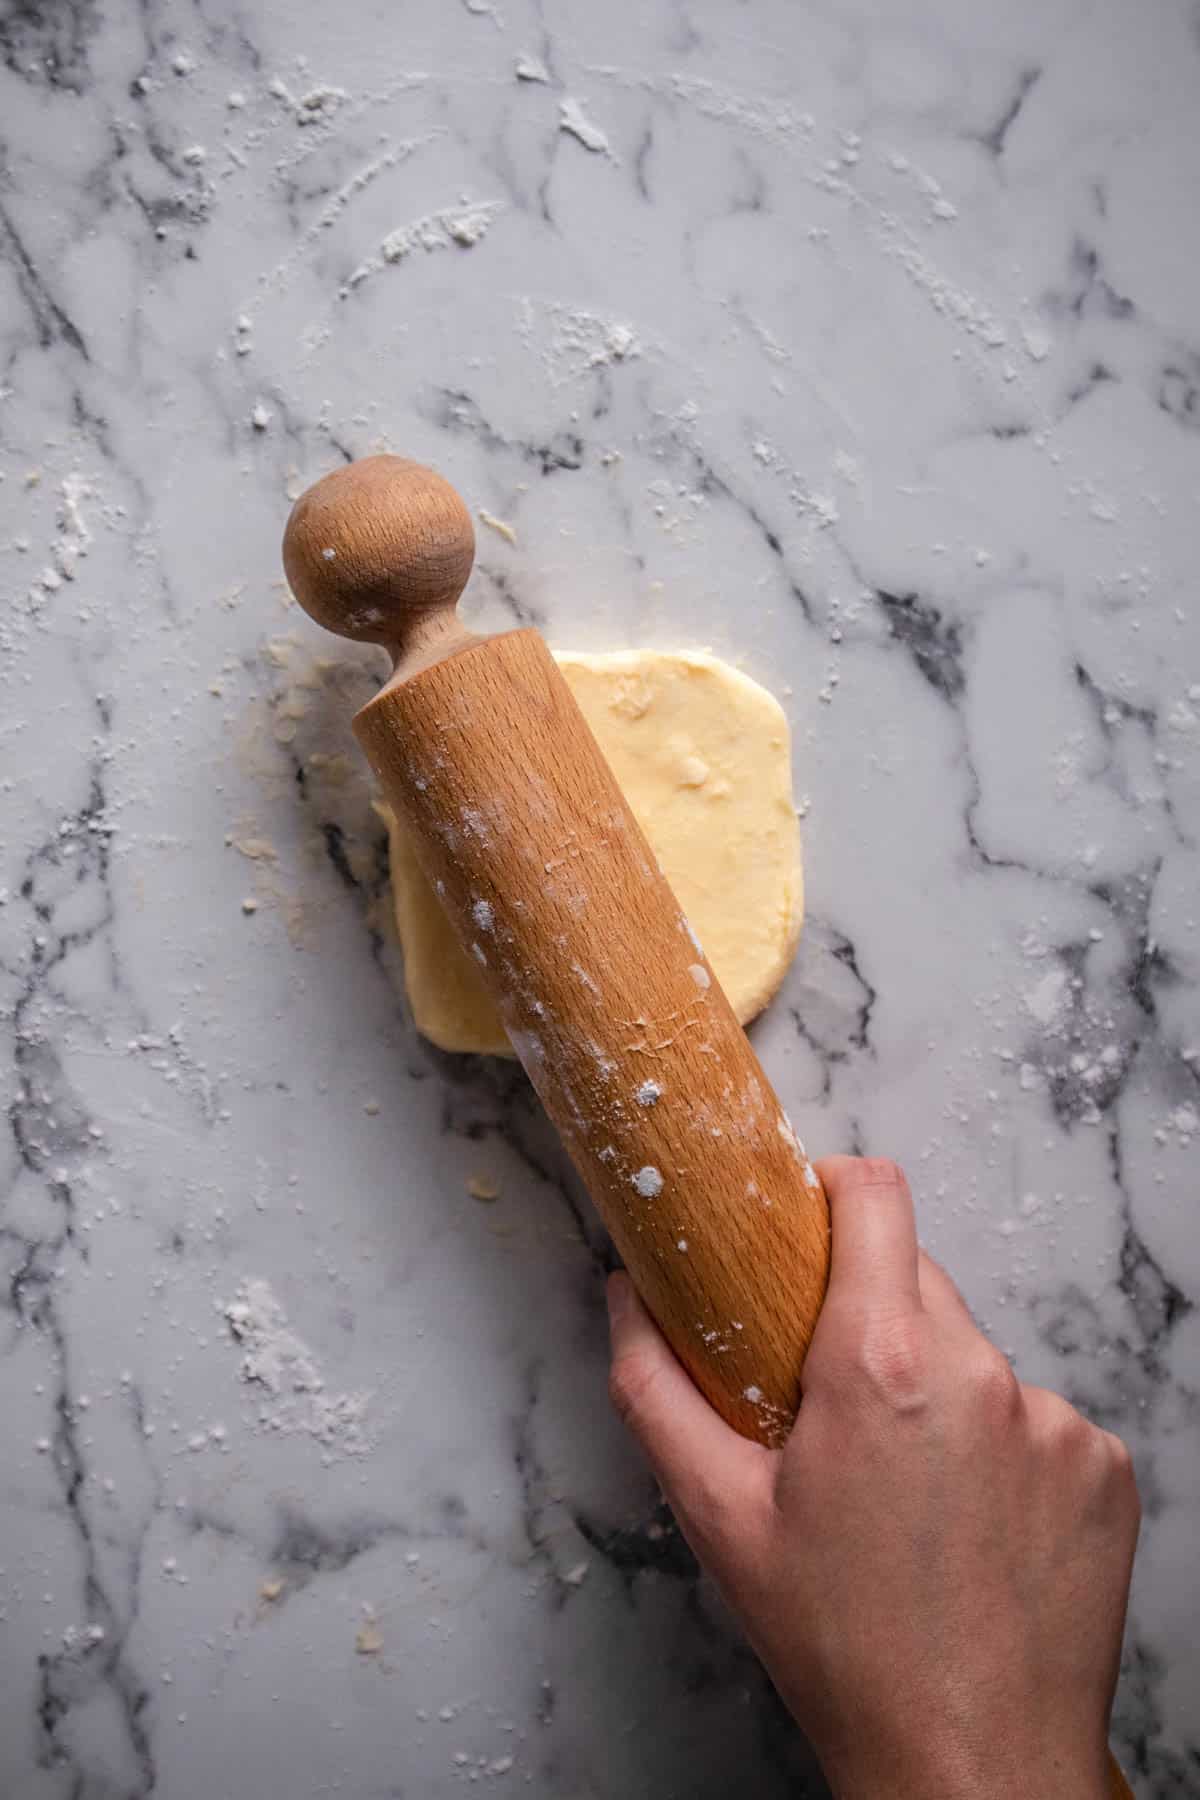
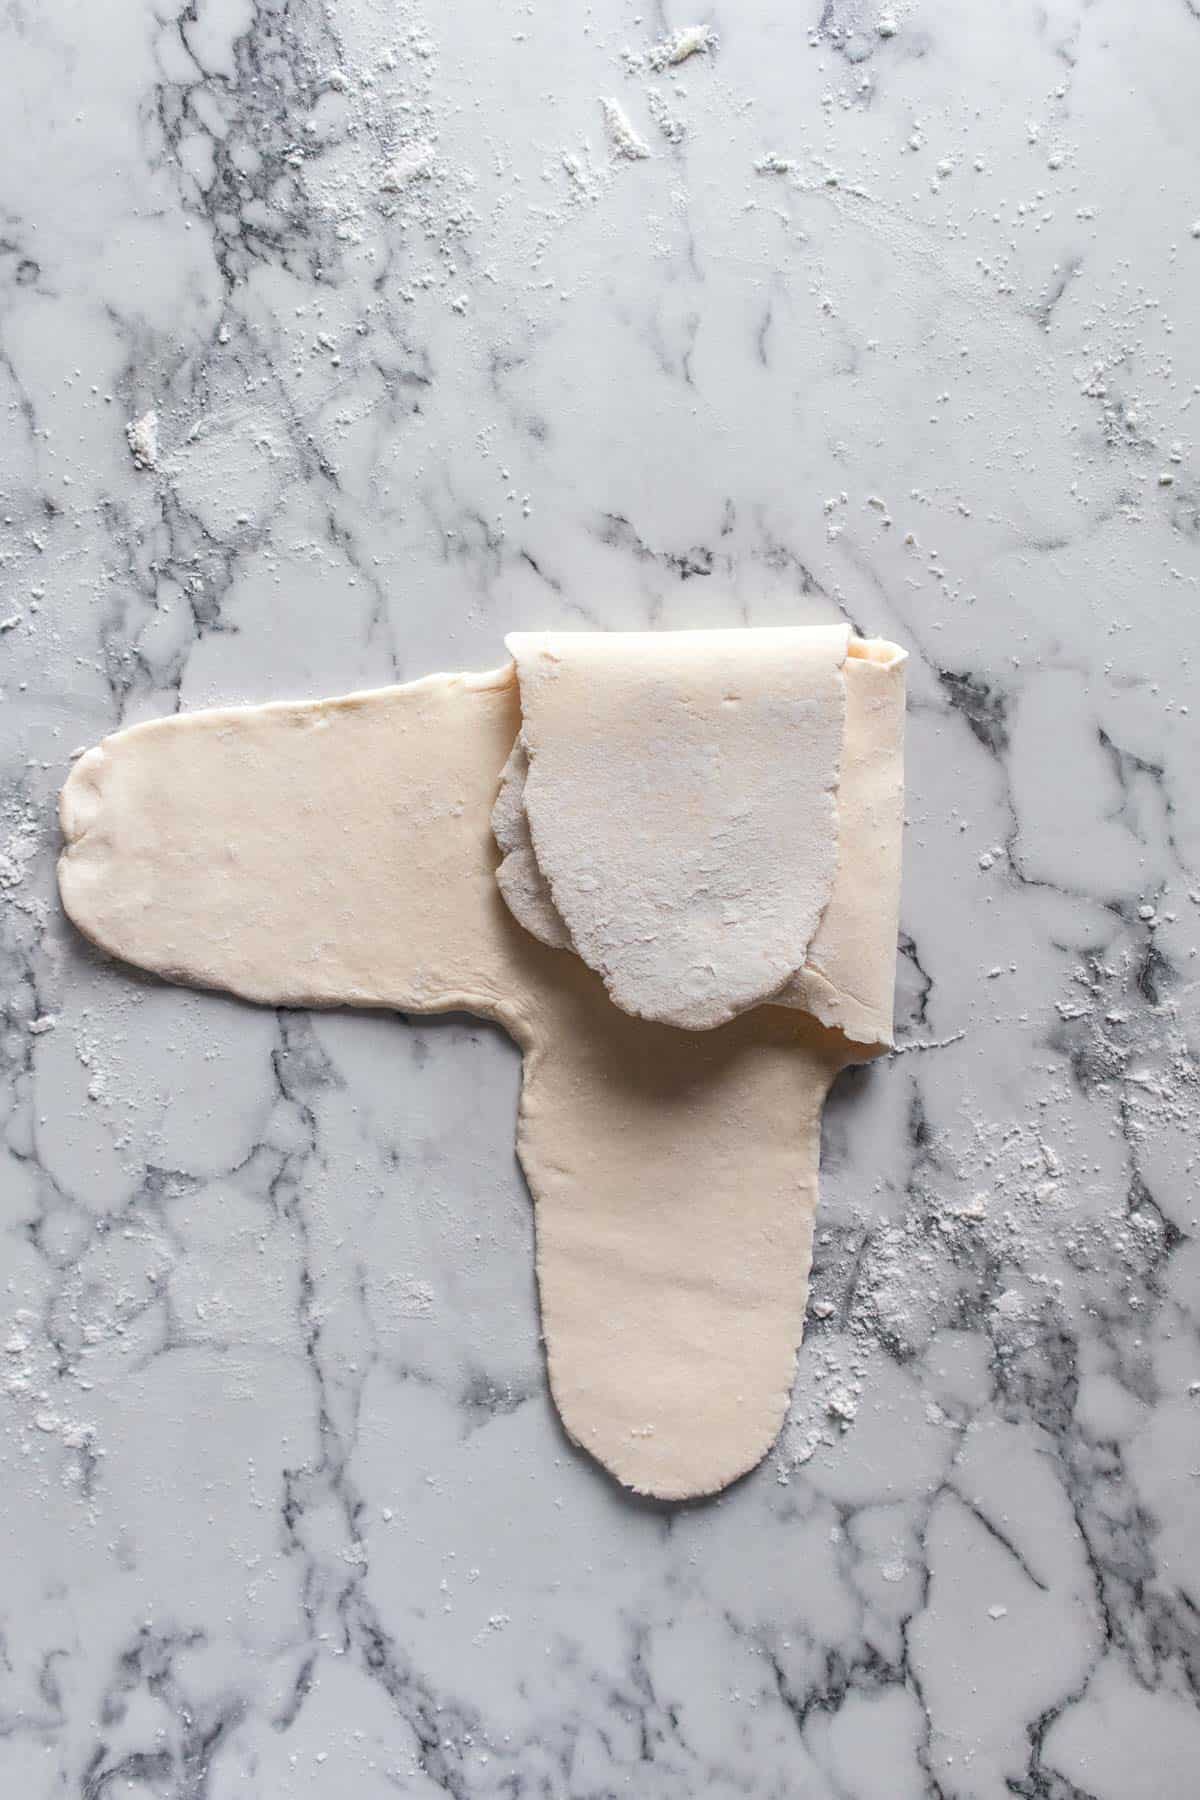
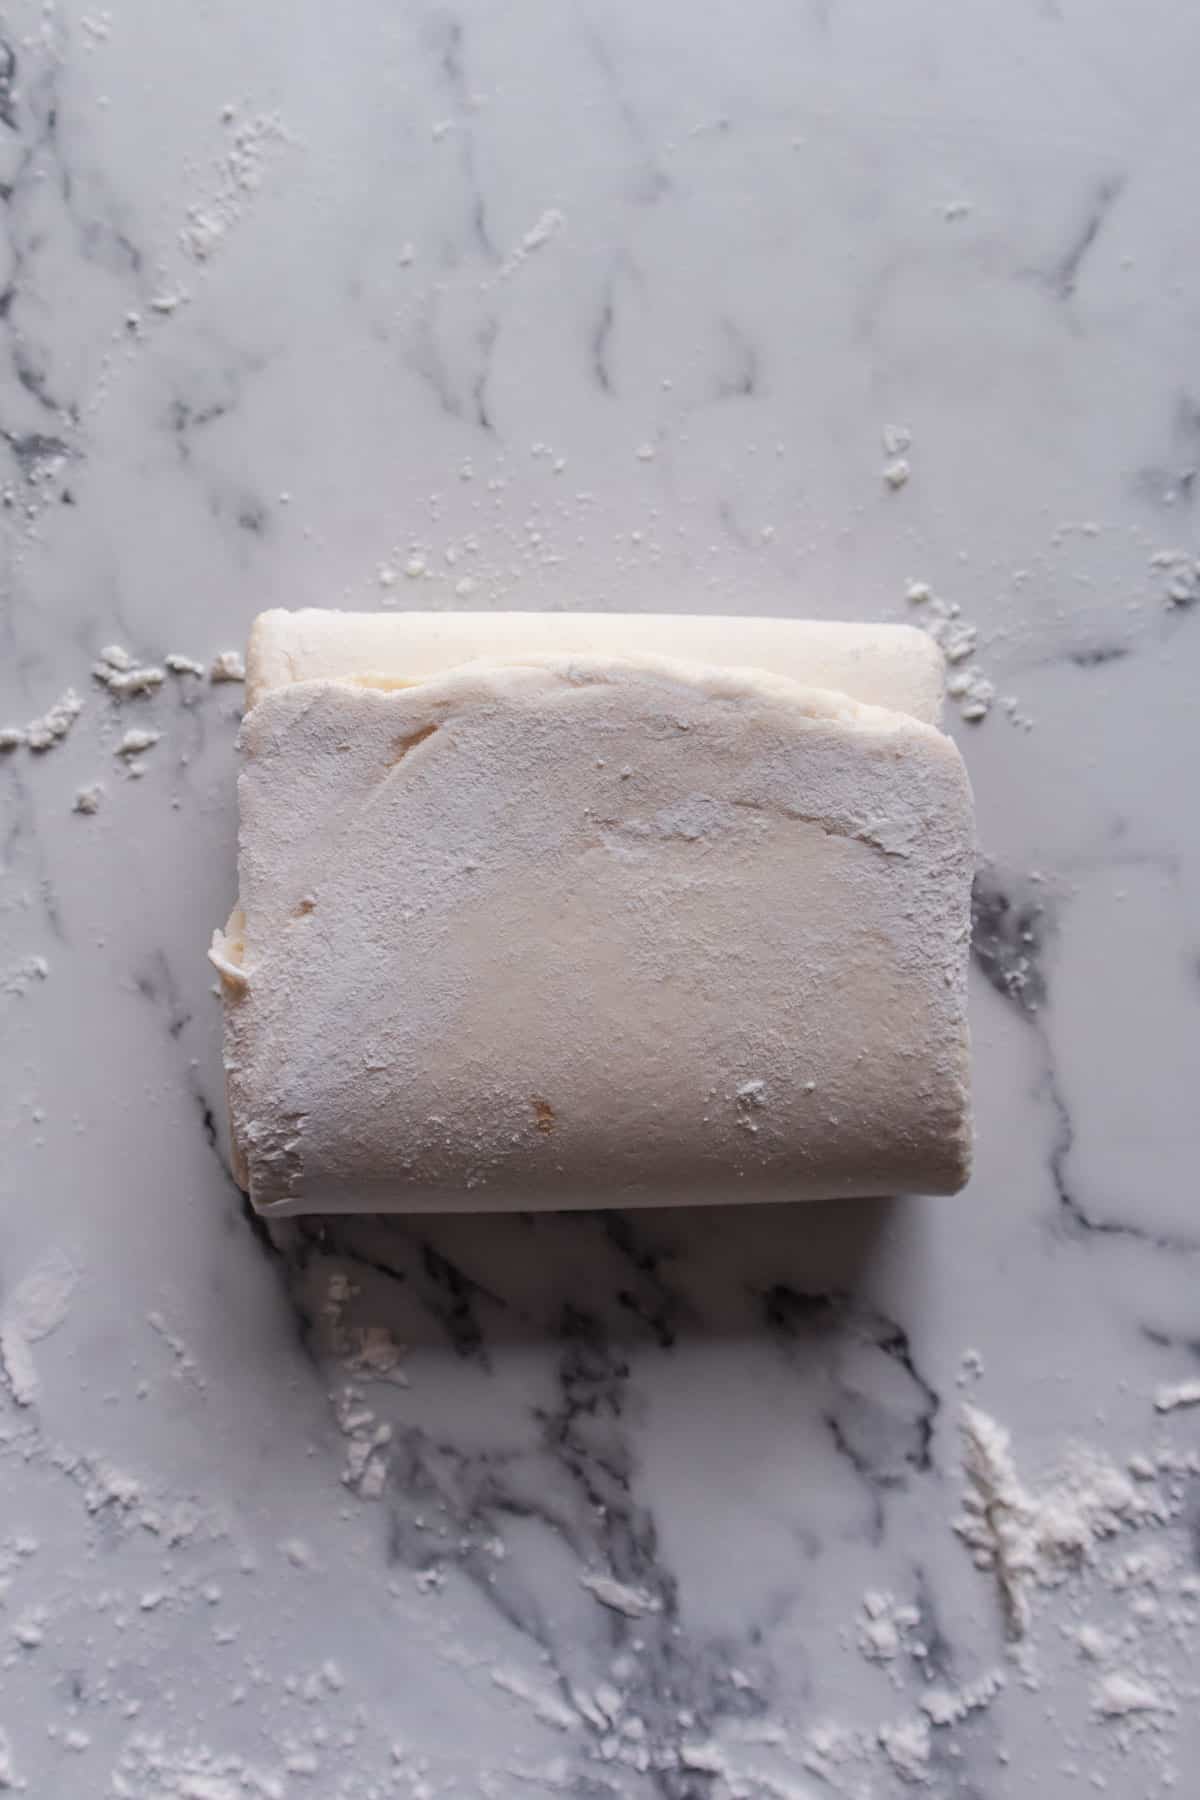
Flour your rolling surface well with gluten-free flour. Take the dough out of the refrigerator and unwrap it from the foil. Place the dough on the rolling surface. Starting from each of the 4 sides, roll out flaps from each side, leaving a roughly 4x4 square of thick dough in the center.
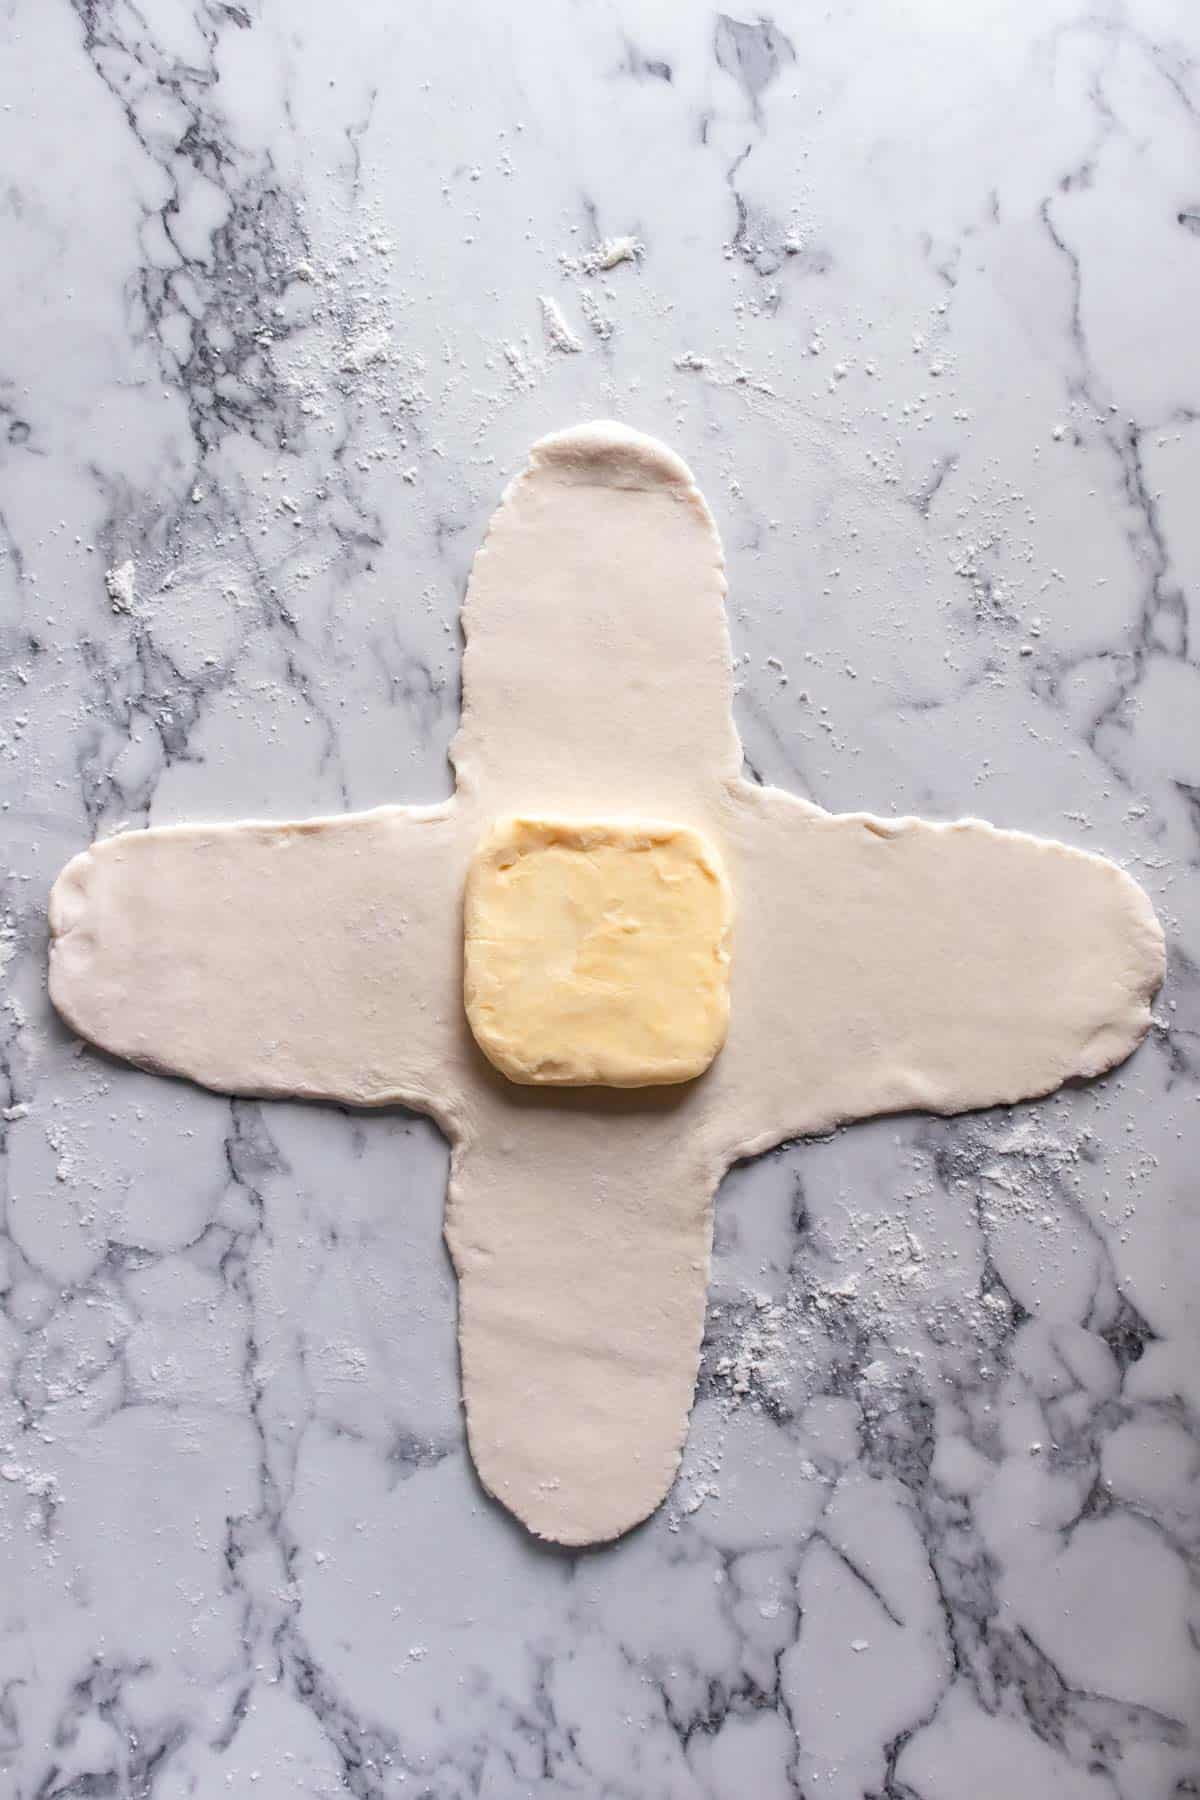
Remove the butter packet from its plastic wrap and place it on top of the thick part of the dough. The butter packet and the dough should be roughly the same length and width.
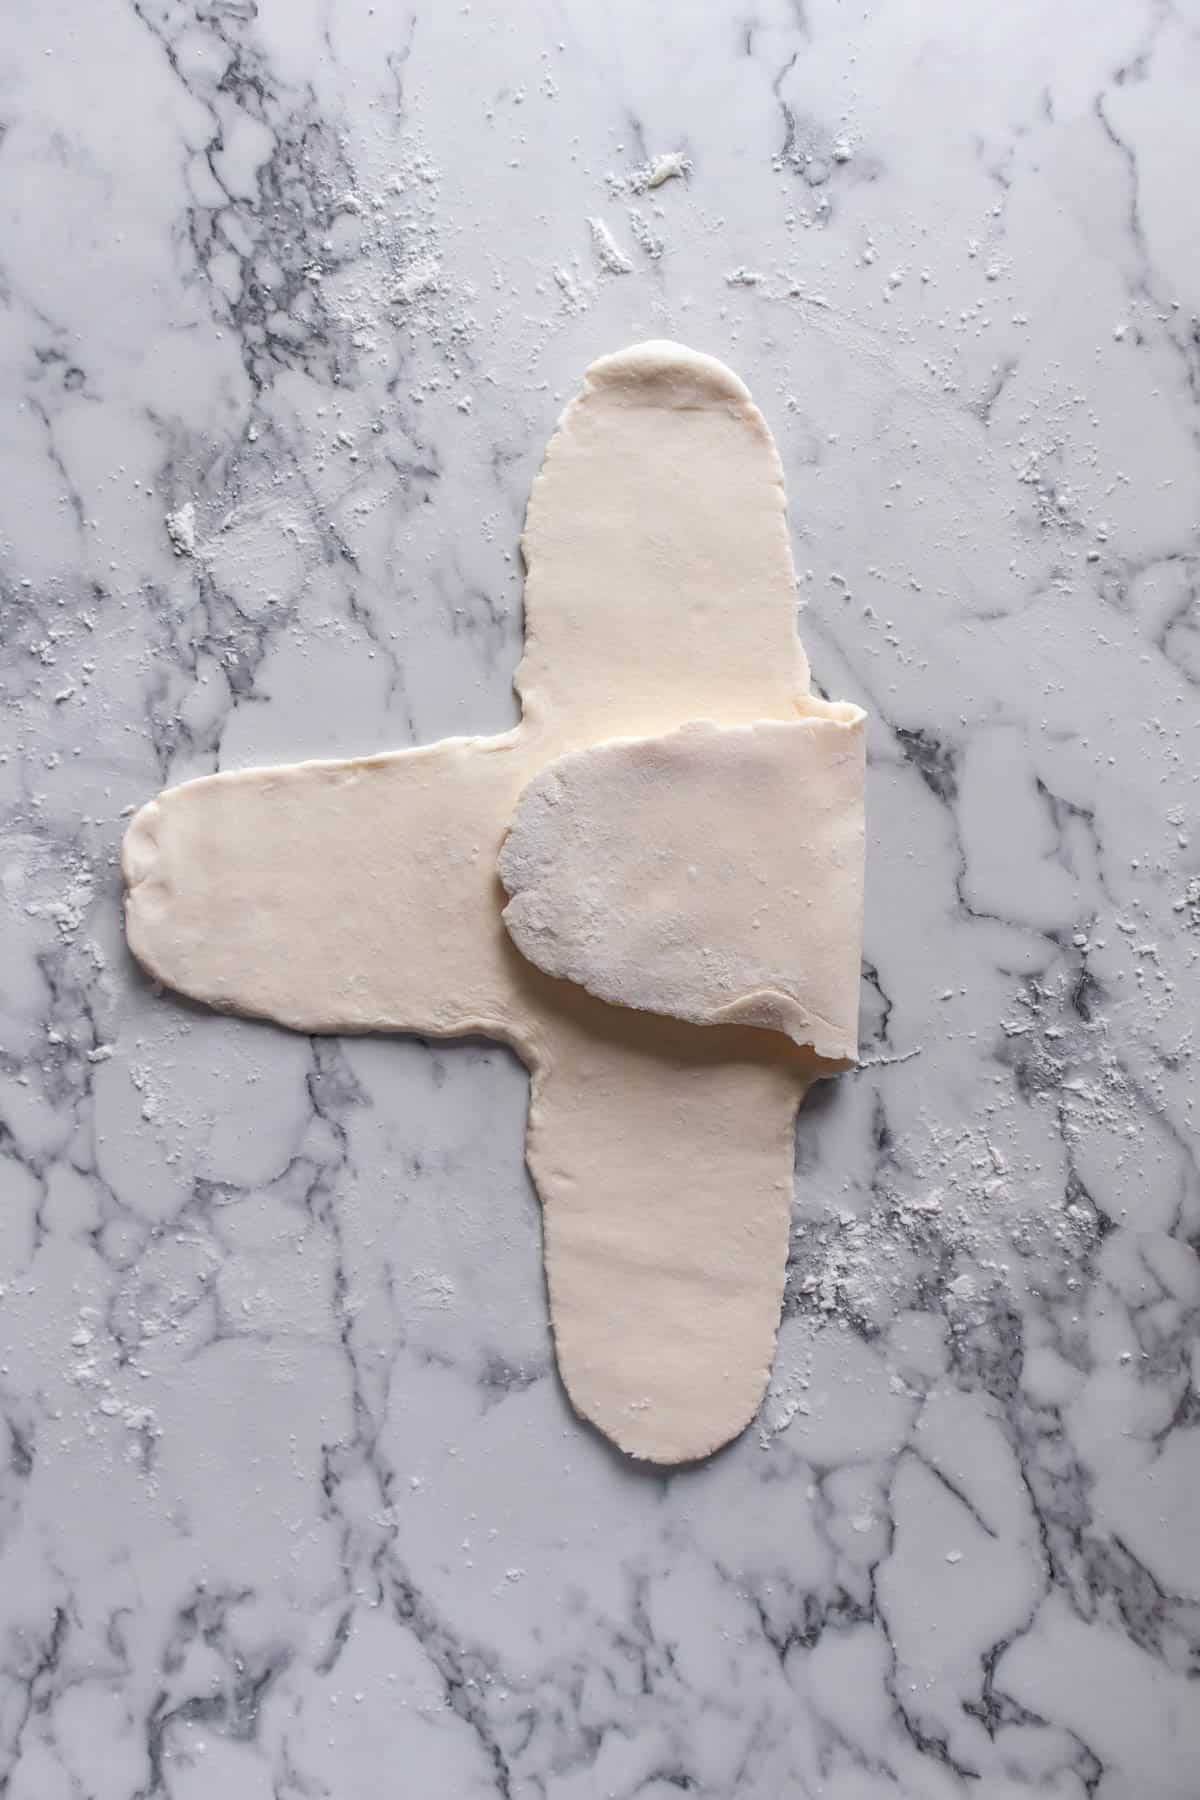
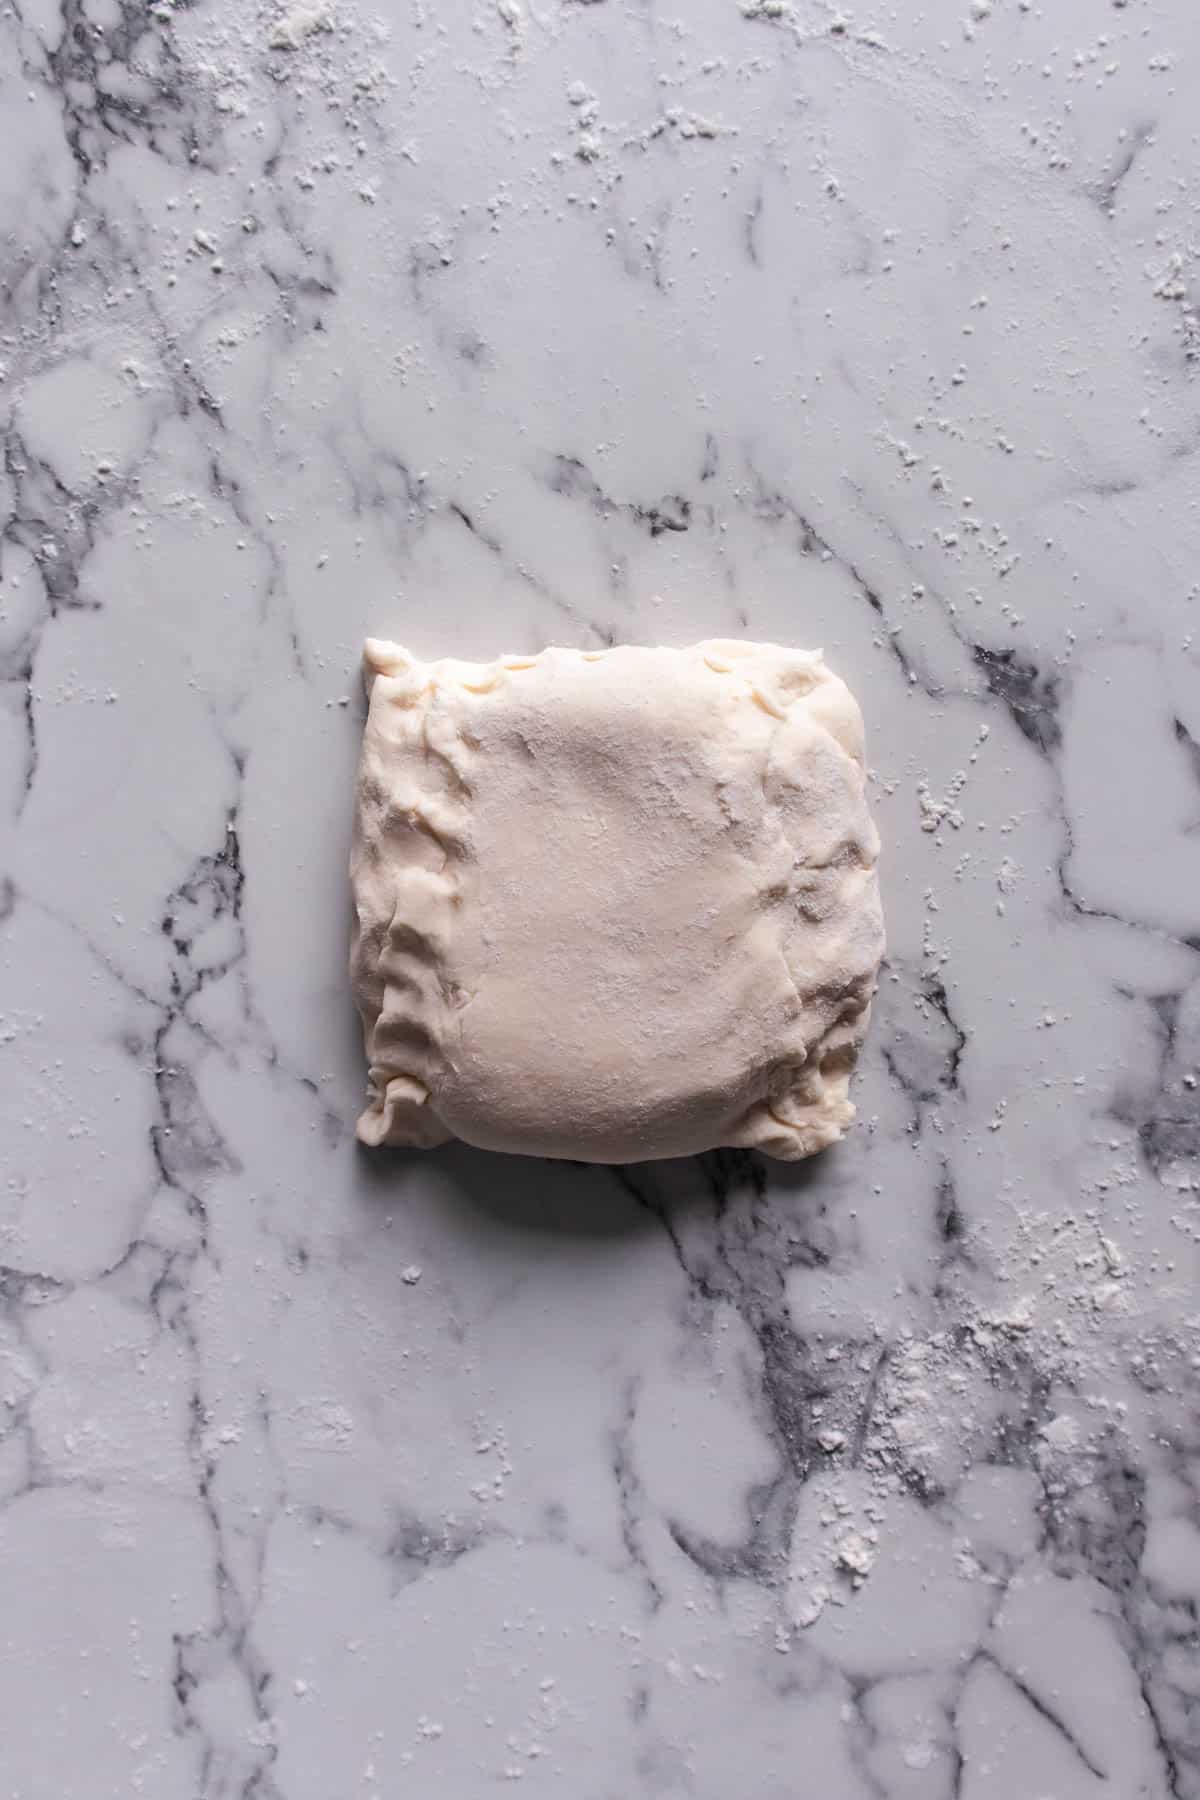
Carefully fold the flaps of dough over the butter, one at a time. When all four flaps are over the butter, it will look like an envelope. Press the dough around the butter packet to seal it in.
Make sure that the butter is completely encased in the dough. You don’t want any of the butter to squeeze through any holes.
Step 4: Roll, fold, and layer
After you wrap the butter in the pastry dough you roll and fold the dough several times to create layers of dough separated by layers of butter. The fold is a key step in making puff pastry. There are two types of classic folds used in puff pastry. I like to use the “single” fold in which you fold the dough like a letter. The other type of fold is called the “double” or “book” fold. This type of fold accomplishes twice the fold (hence the name) as the single fold. Repeat the process of rolling, folding, marking, and chilling for at least 4, and up to 6, turns.
Once you have done your last turn wrap it in plastic wrap and refrigerate it until you are ready to use.
Make ahead and storage tips
You can make gluten-free puff pastry dough ahead of time and then wrap it tightly and refrigiate it for up to 1 week or freeze it for up to 1 month. I recommend freezing it once you have finished all the turns. I also recommend freezing the entire dough because rolled gluten-free puff pastry sheets don’t freeze very well and tend to crack once you start working with them.
Recipe tips
- Keep everything cold. It is important that you use ingredients that are cold and that you keep the dough cold. If the dough gets too warm the butter will start to melt, when the butter melts you will lose the layers and without layers, you won’t get any puff.
- Roll and fold at least 4 times. That will ensure more layers and a better puff in the oven.
- Bake it at 400F (200C) or above. This will ensure that it puffs up beautifully without any butter leakage
- Don’t roll the dough too thin. When you do the turns, don’t roll the dough too thin because you can end up tearing it and you will lose the layers.
- To keep your pastry from cracking make sure that it is not too cold. Yes I know, I said it is important to keep everything cold and that still applies here, however you will need to let the dough warm up just enough so it is pliable but not so much that the butter melts
- If your dough feels sticky just sprinkle more flour on your work surface.
Gluten-Free Puff Pastry Variations
Gluten-Free Dairy-Free Puff Pastry Dough
If you want to make this recipe day free replace the butter and sour cream with a vegan alternative.
Gluten-Free Vegan Puff Pastry Dough
This recipe doesn’t use any other animal products, so if you replace the butter and sour cream with a vegan alternative this recipe will be vegan
FAQ
This usually happens when the puff pastry dough gets too warm and the butter starts to melt, that’s why it is important to keep the puff pastry dough cold.
No, puff pastry will become oily when the butter hasn’t remained solid during shaping.
Yes, you can, but make sure to use a firm block of vegan butter because if it is too soft it might not create a properly layered structure.
More Gluten-Free Baked Goods
- Gluten-Free Foccacia
- Gluten-Free Dinner Rolls
- Gluten-Free Brioche
- Gluten-Free Garlic Knots
- Gluten-Free Soft Pretzels
- Gluten-Free Bagels
Did you make this? Please RATE THE RECIPE below!
Recipe
Gluten-Free Puff Pastry
Ingredients
For the dough
- 1 ⅓ cups gluten-free flour
- ¾ teaspoon salt
- 5.3 oz sour cream (cold)*
- 3 to 5 tablespoon ice cold water
For the butter packet
- ⅓ cup butter
- Additional gluten-free flour for rolling the dough
Instructions
To make the dough
- In a large mixing bowl, stir together flour and salt. Add the water and sour cream and stir the mixture until it comes together. The dough should hold together well but shouldn't be wet and sticky. (if it is crumbly add more water if it is too wet add more flour)
- Wrap the dough in a foil and place it in the fridge, while you prepare the butter packet.
To make the butter packet
- Using your rolling pin, beat the butter into an evenly-thick square. You may need to mess around with it a bit to get this into a uniform thickness.
- Set the butter packet aside. It should be cold and firm but not hard (also, if it’s getting too soft, put in the refrigerator) while you roll out your dough.
- Flour your rolling surface well with gluten-free flour. Take the dough out of the refrigerator and unwrap from the foil. Place the dough on the rolling surface. Starting from each of the 4 sides, roll out flaps from each side, leaving a roughly 4″x4″ square of thick dough in the center.
- Remove the butter packet from its plastic wrap and place it on top of the thick part of the dough. The butter packet and the dough should be roughly the same length and width.
- Carefully fold the flaps of dough over the butter, one at a time. When all four flaps are over the butter, it will look like an envelope.Press the dough around the butter packet to seal it in.
- Make sure that the butter is completely encased in the dough. You don’t want any of the butter to squeeze through any holes.
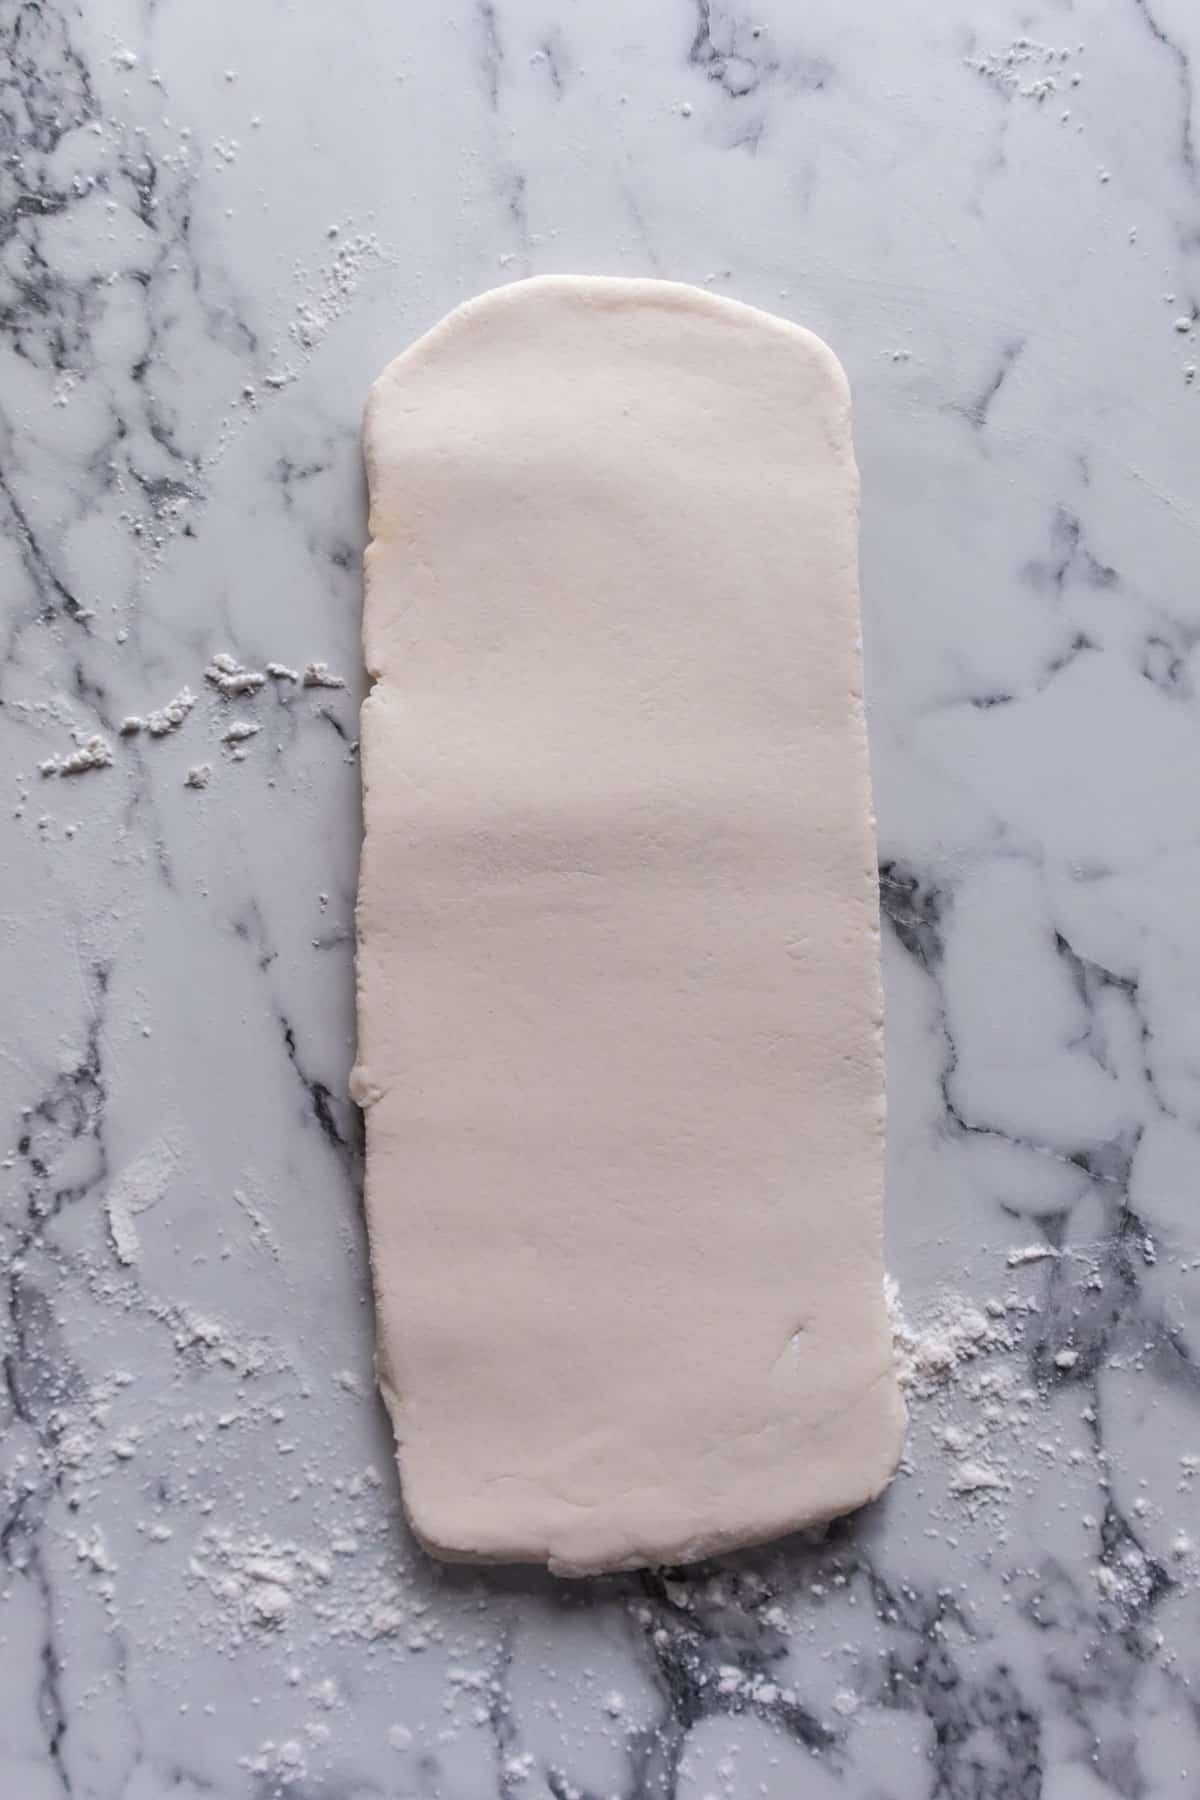
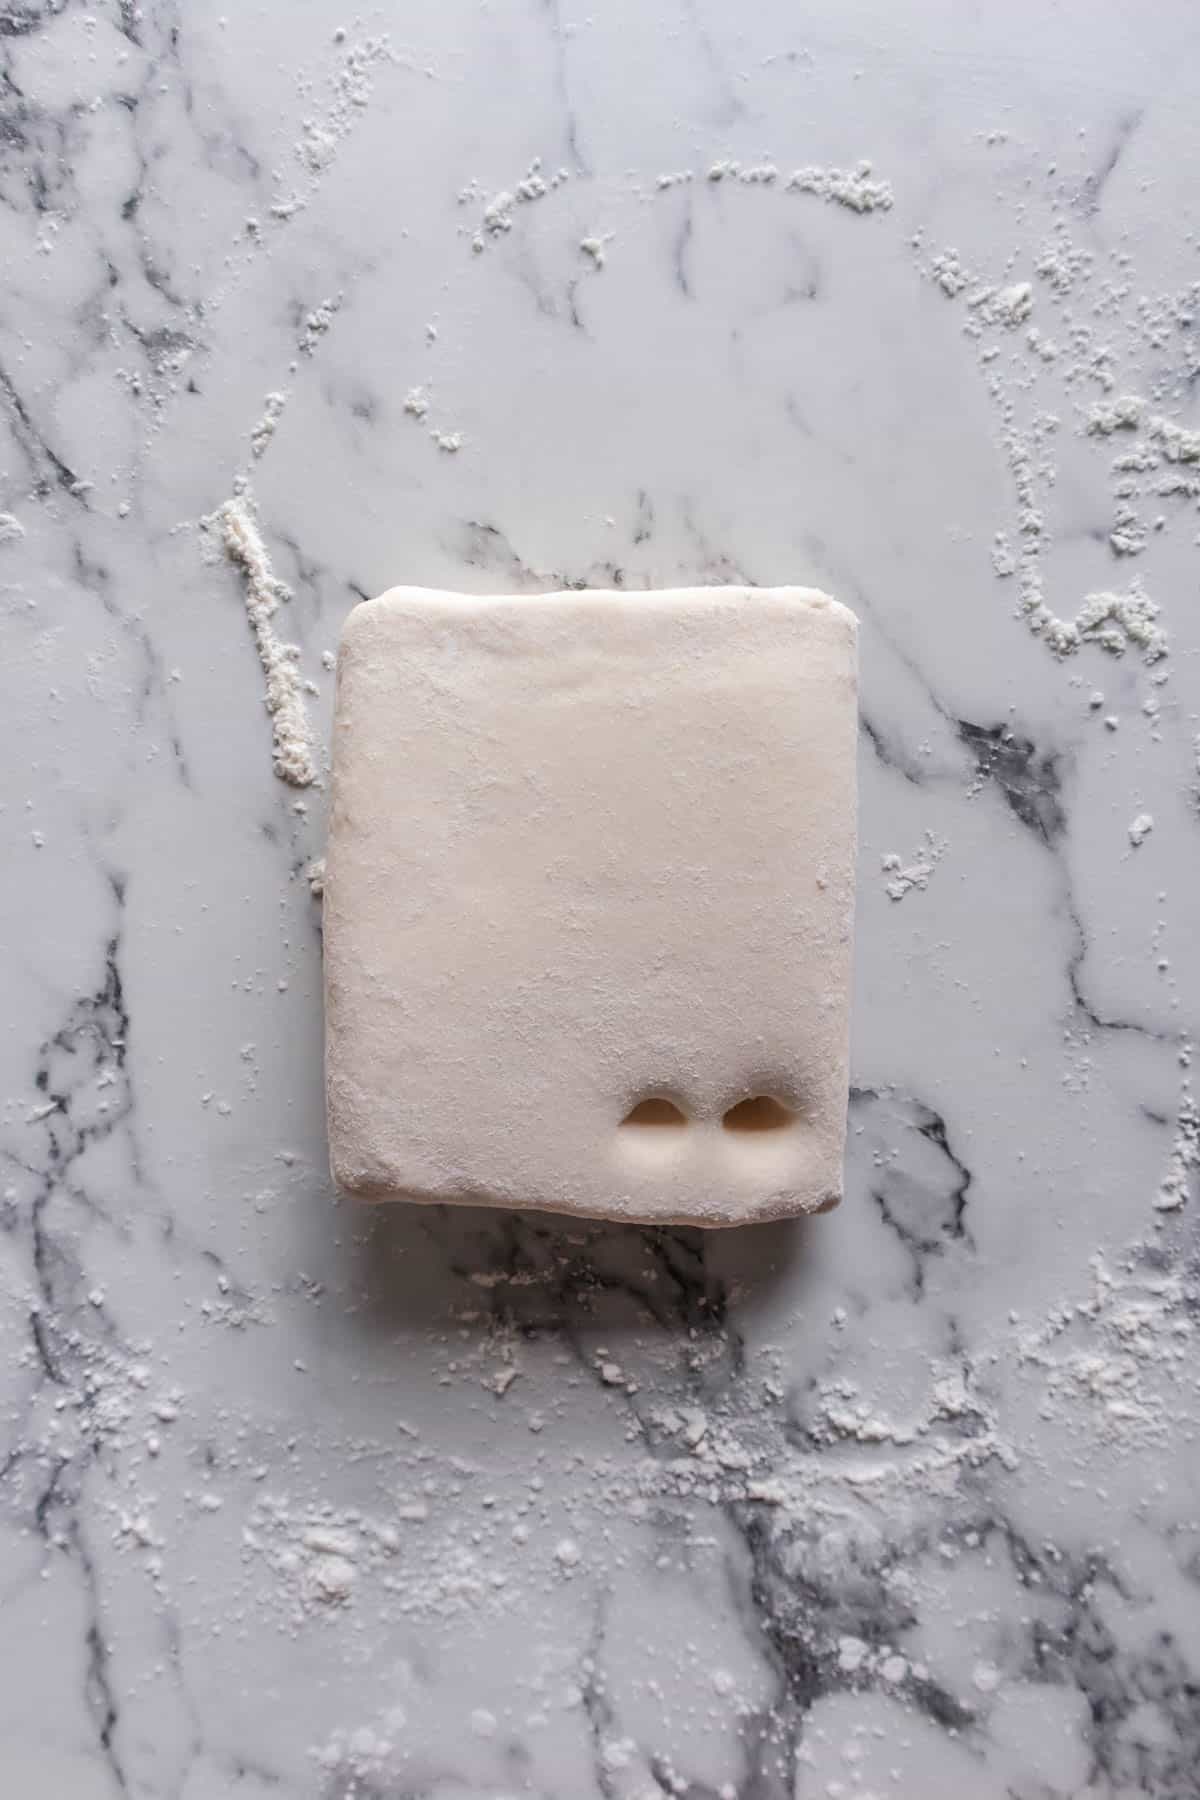
- Now you are ready to do the first “turn.” Add some more flour to your rolling surface (make sure it is well floured at all times). Also, make sure your rolling pin is floured, as well. Now carefully roll your dough out in a long rectangle. (The rectangle should be roughly ½ inch thick and about 3 times as long as it is wide.)
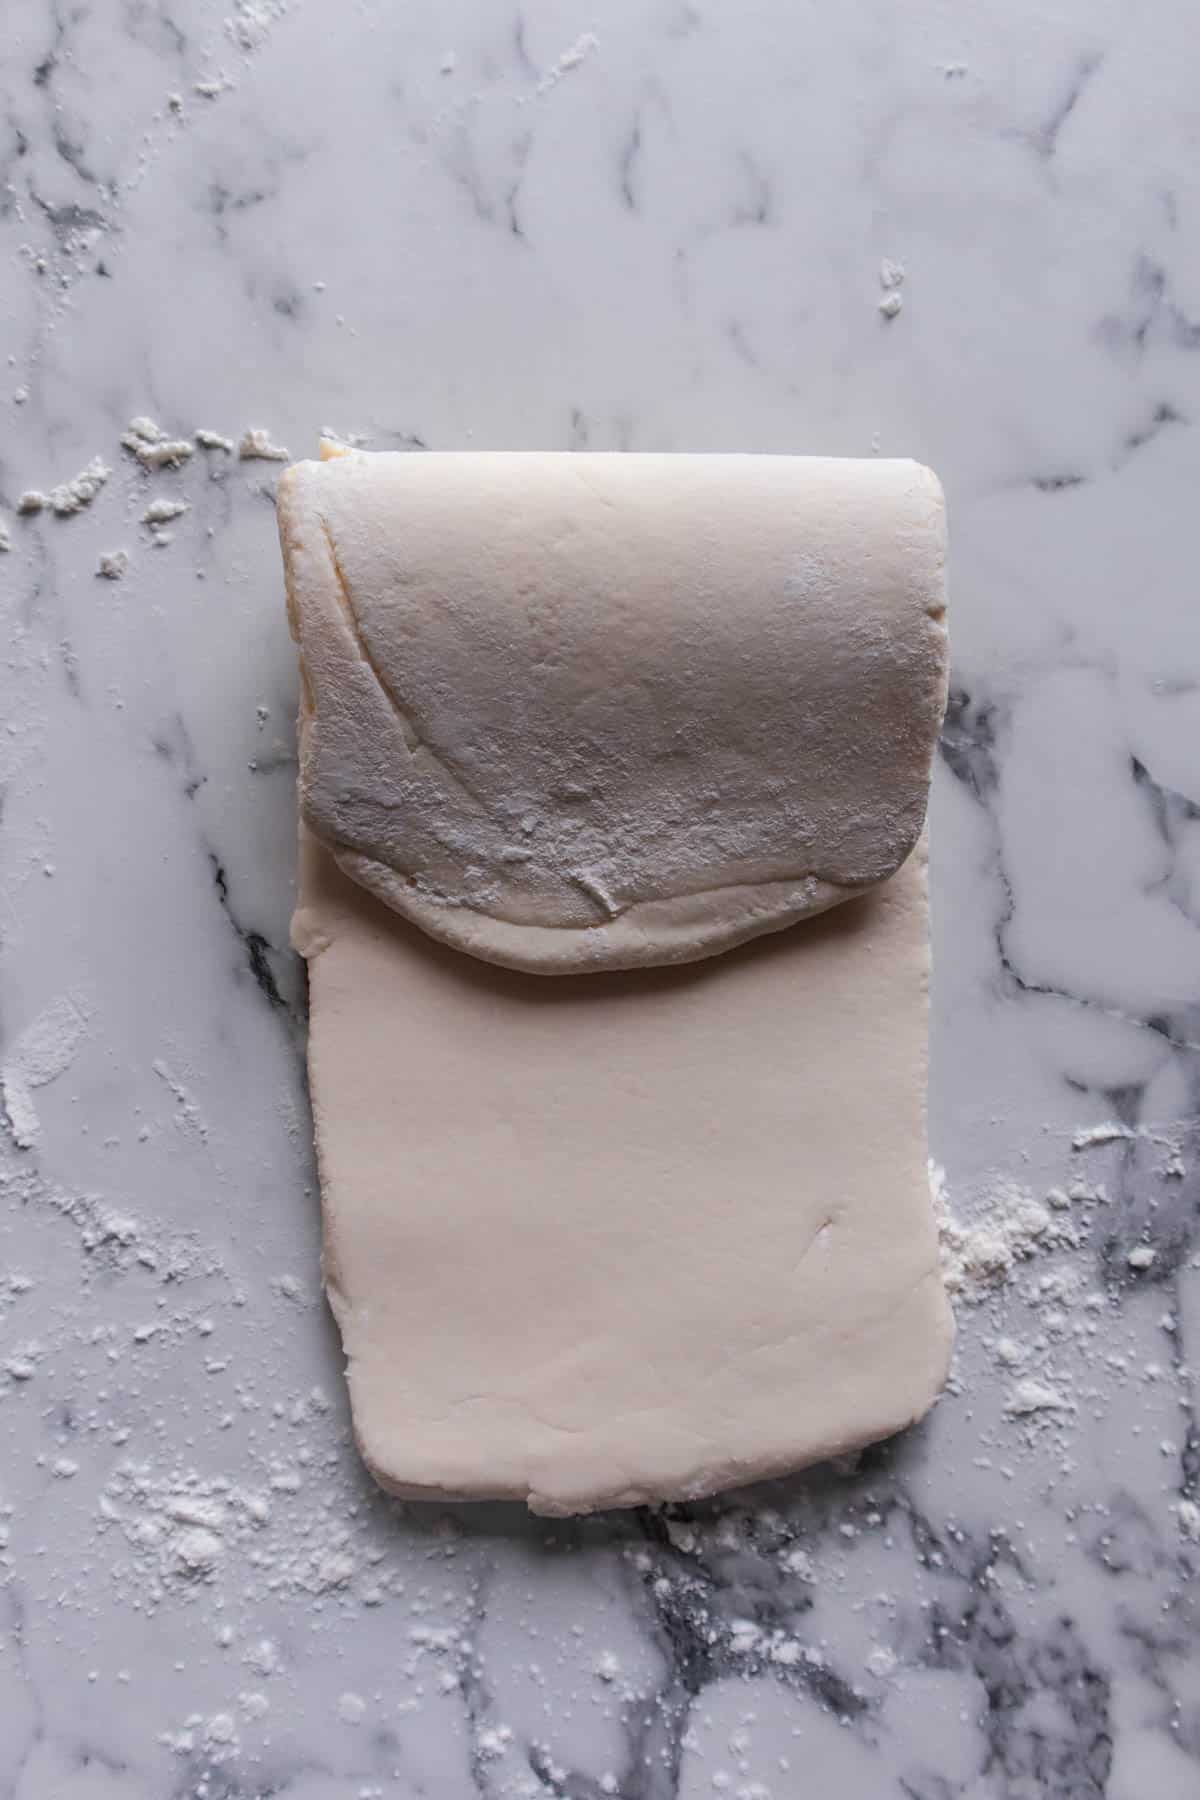
- And now you do the first fold. I recommend doing the single fold method. (Simply take one end of your dough and fold roughly a third of it onto the top of the dough.) Then take your other end and fold it on top of the already folded dough–as you would with a letter.
- With a floured knuckle, make one single impression on the dough, to represent the completion of one turn. Cover the dough with plastic wrap and place in the refrigerator until firm, about 15 minutes.
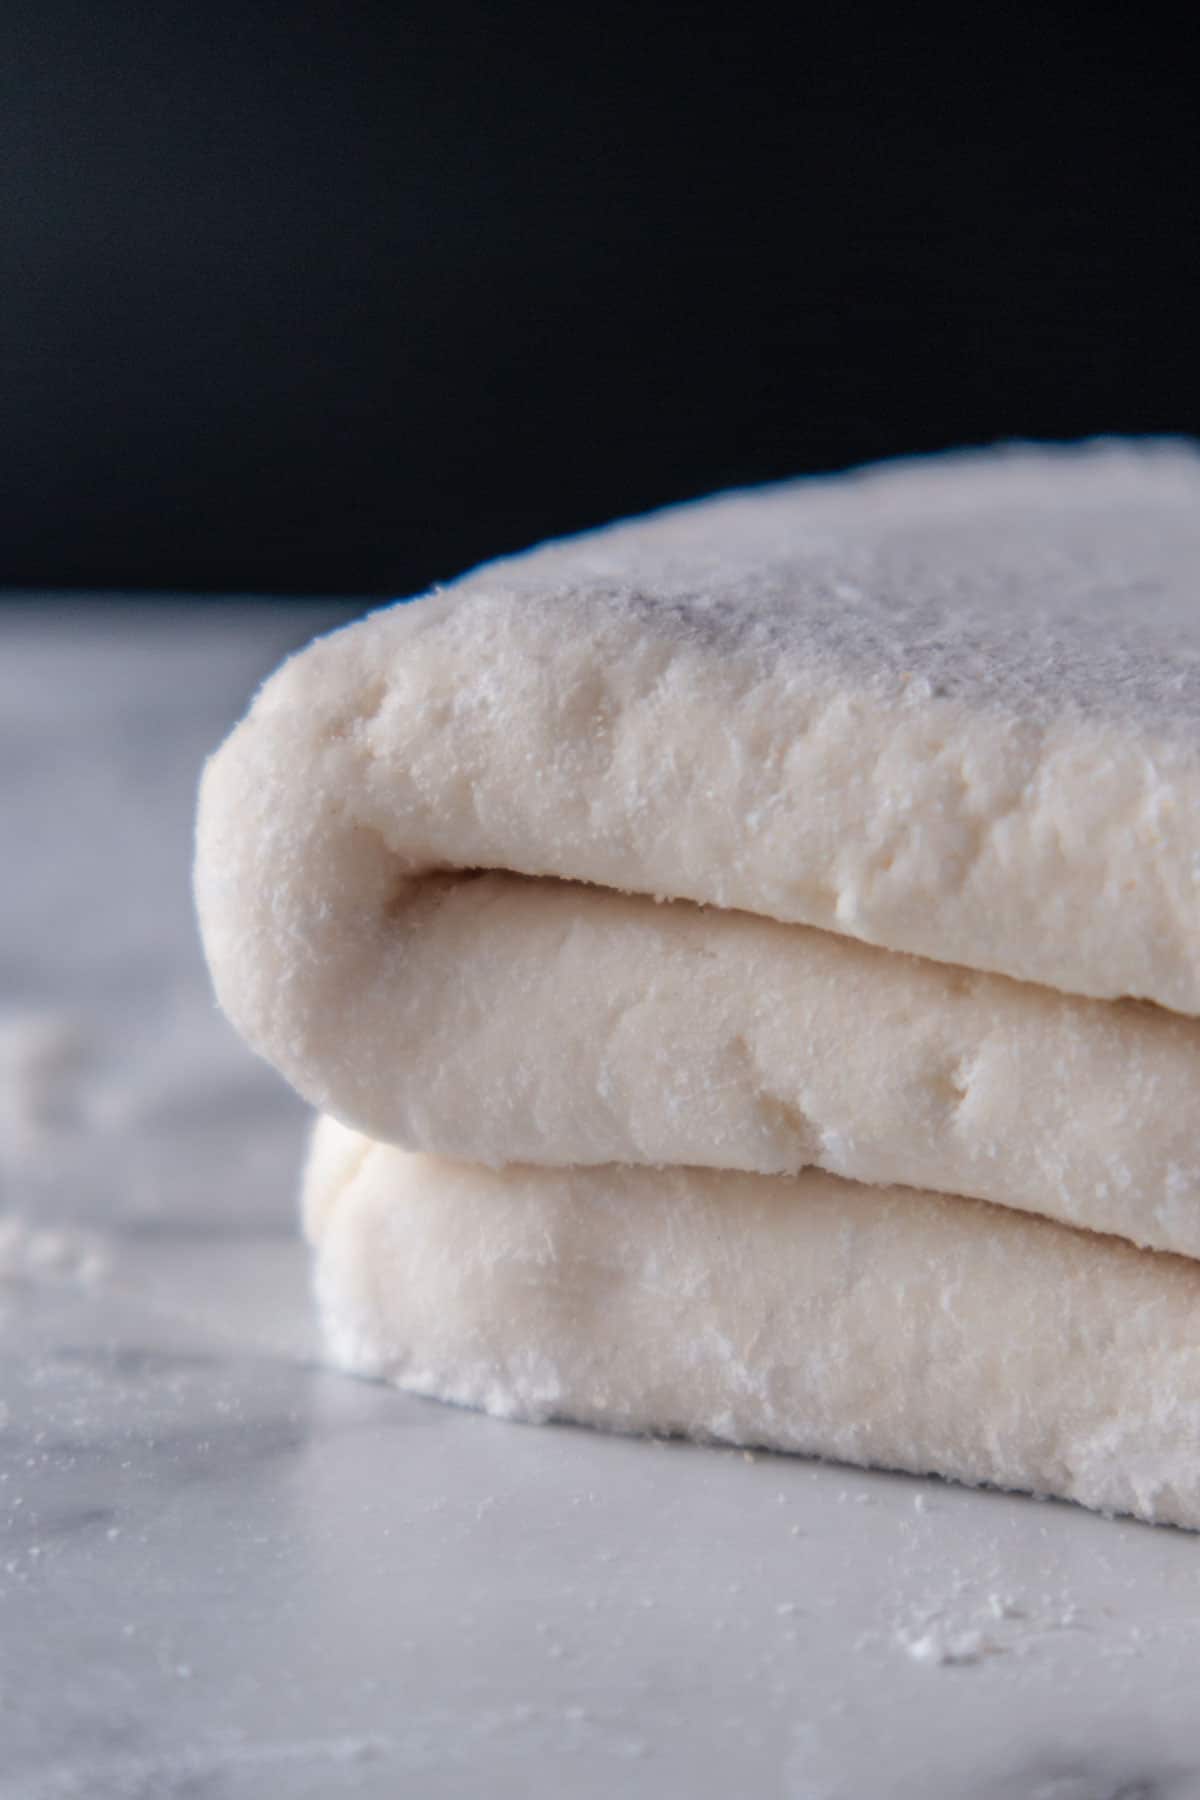
- Once the dough is firm, remove it from the refrigerator, flour the outside and once again, with a long side of the folded dough facing you, roll away from you and into a long rectangle about ½ inch thick. Fold once more, and mark the dough twice with your knuckle, to represent two completed turns. Refrigerate until firm, and repeat the process of rolling, folding, marking and chilling for at least 4, and up to 6, turns.
- Once you’ve repaired your dough and have made it look as neat as possible, wrap tightly in plastic wrap and refrigerate or freeze until ready to use. If you freeze the puff pastry, defrost overnight in the refrigerator before using.
- Bake it at 400°F (200°C) or above.
Notes
- Keep everything cold. If the dough gets too warm the butter will start to melt, when the butter melts you will lose the layers and without layers, you won’t get any puff.
- Bake it at 400°F (200°C) or above. This will ensure that it puffs up beautifully without any butter leakage.
- Don’t roll the dough too thin. When you do the turns, don’t roll the dough too thin because you can end up tearing it and you will lose the layers.
Therese says
What temperature and how long do I bake this for? I just made the recipe it is amazing!!! I’m so excited to make this for Christmas. Also, I never post reviews on recipes but this one was on point so I had too haha
Gluten Free Stories says
Hi Therese, I'm so happy to hear that!❤️ I baked mine at 200°C (or 400°F) for about 20-25 minutes or until it looks puffed and is golden brown.
Mariann says
How much salt do you mix with the flour?
Gluten Free Stories says
Hi Mariann, 3/4tsp salt is mixed in the flour.
Brenda says
Wow, I can't wait to try this! Thank you for the detailed instructions! How many servings does this make?
Gluten Free Stories says
Hi Brenda, this makes 1 block of puff pastry.
Erika says
Thanks for the recipe I can't wait to try it!
Can I substitute the sour cream from a non-dairy products? I am dairy free; Thank you!